FortiGate-VM Virtual Appliance
Application Description
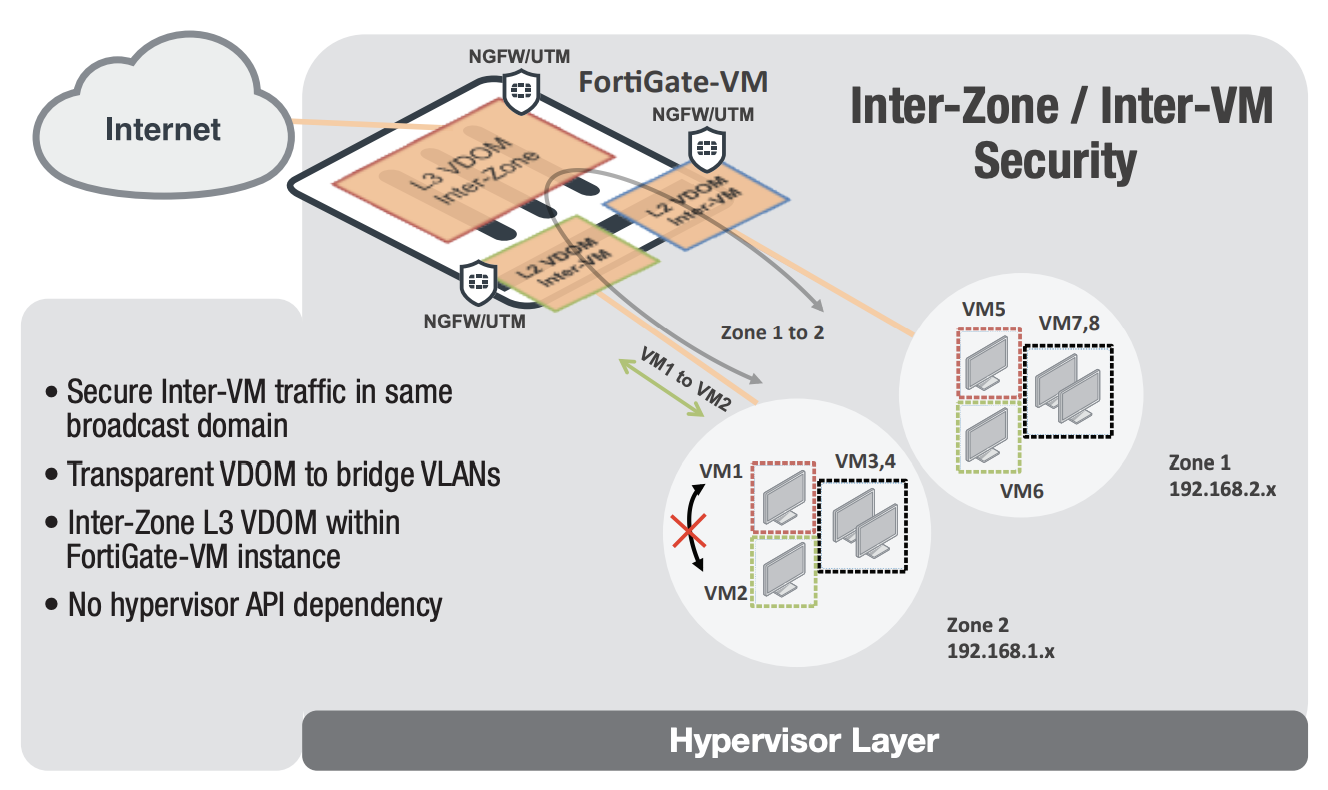
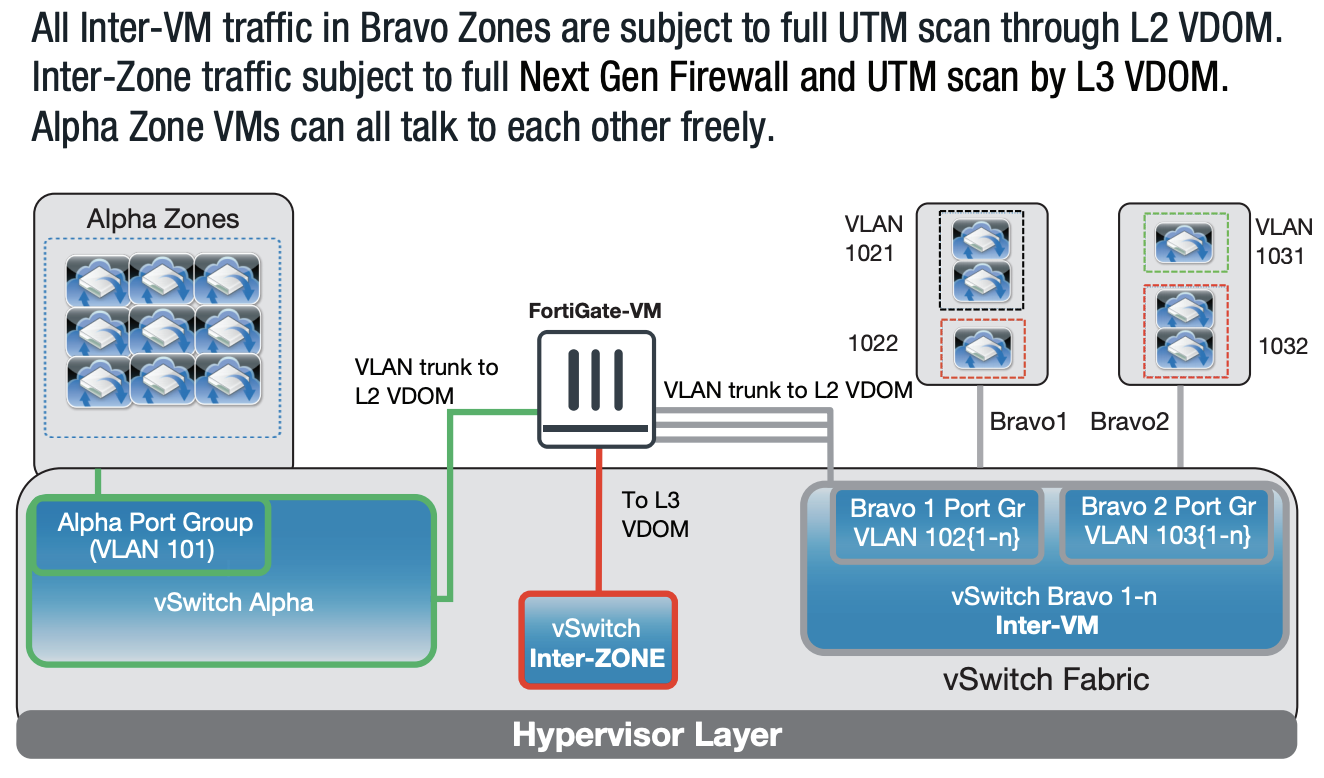
FortiGate-VM is a full-featured FortiGate firewall packaged as a virtual appliance. FortiGate-VM virtual appliance is ideal for monitoring and enforcing virtual traffic on leading virtualization, cloud, and SDN platforms. FortiGate-VM can be orchestrated in software-defined environments to provide agile and elastic network security services to virtual workloads. FortiGate-VM allows to deploy firewall, intrusion prevention, VPN, antivirus, and other consolidated security functions to virtual workloads, based on the easy-to-use web interface and contextual displays.
[Reference] FortiGate-VM Datasheet: https://www.fortinet.com/content/dam/fortinet/assets/data-sheets/fortigate-vm.pdf
Infrastructure Environment tested
The FortiGate-VM Firewall virtual appliance has been tested on the following:
| Resource | Value |
|---|---|
| Host OS | FortiOS x86-64 |
| Version | FortiGate-VM64-Xen v6.0.4,build0231,190107 (GA) |
| Package manager | N/A |
| Application version | IPS-DB: 6.00741(2015-12-01 02:30) |
| Environments tested | Sunlight |
Configuration and Setup description
The Sunlight Enterprise Platform can act as a private cloud to run the FortiGate virtual appliances. The image of FortiGate VM is already pre-loaded on the platform. When deploying a FortiGate virtual appliance, based on the FortiGate licence to be applied on the appliance, the required flavour can be created and configured before generating the instances. The virtual private network and virtual network interfaces attached to the VM can also be configured with VLAN support.
Deploy the FortiGate VM
-
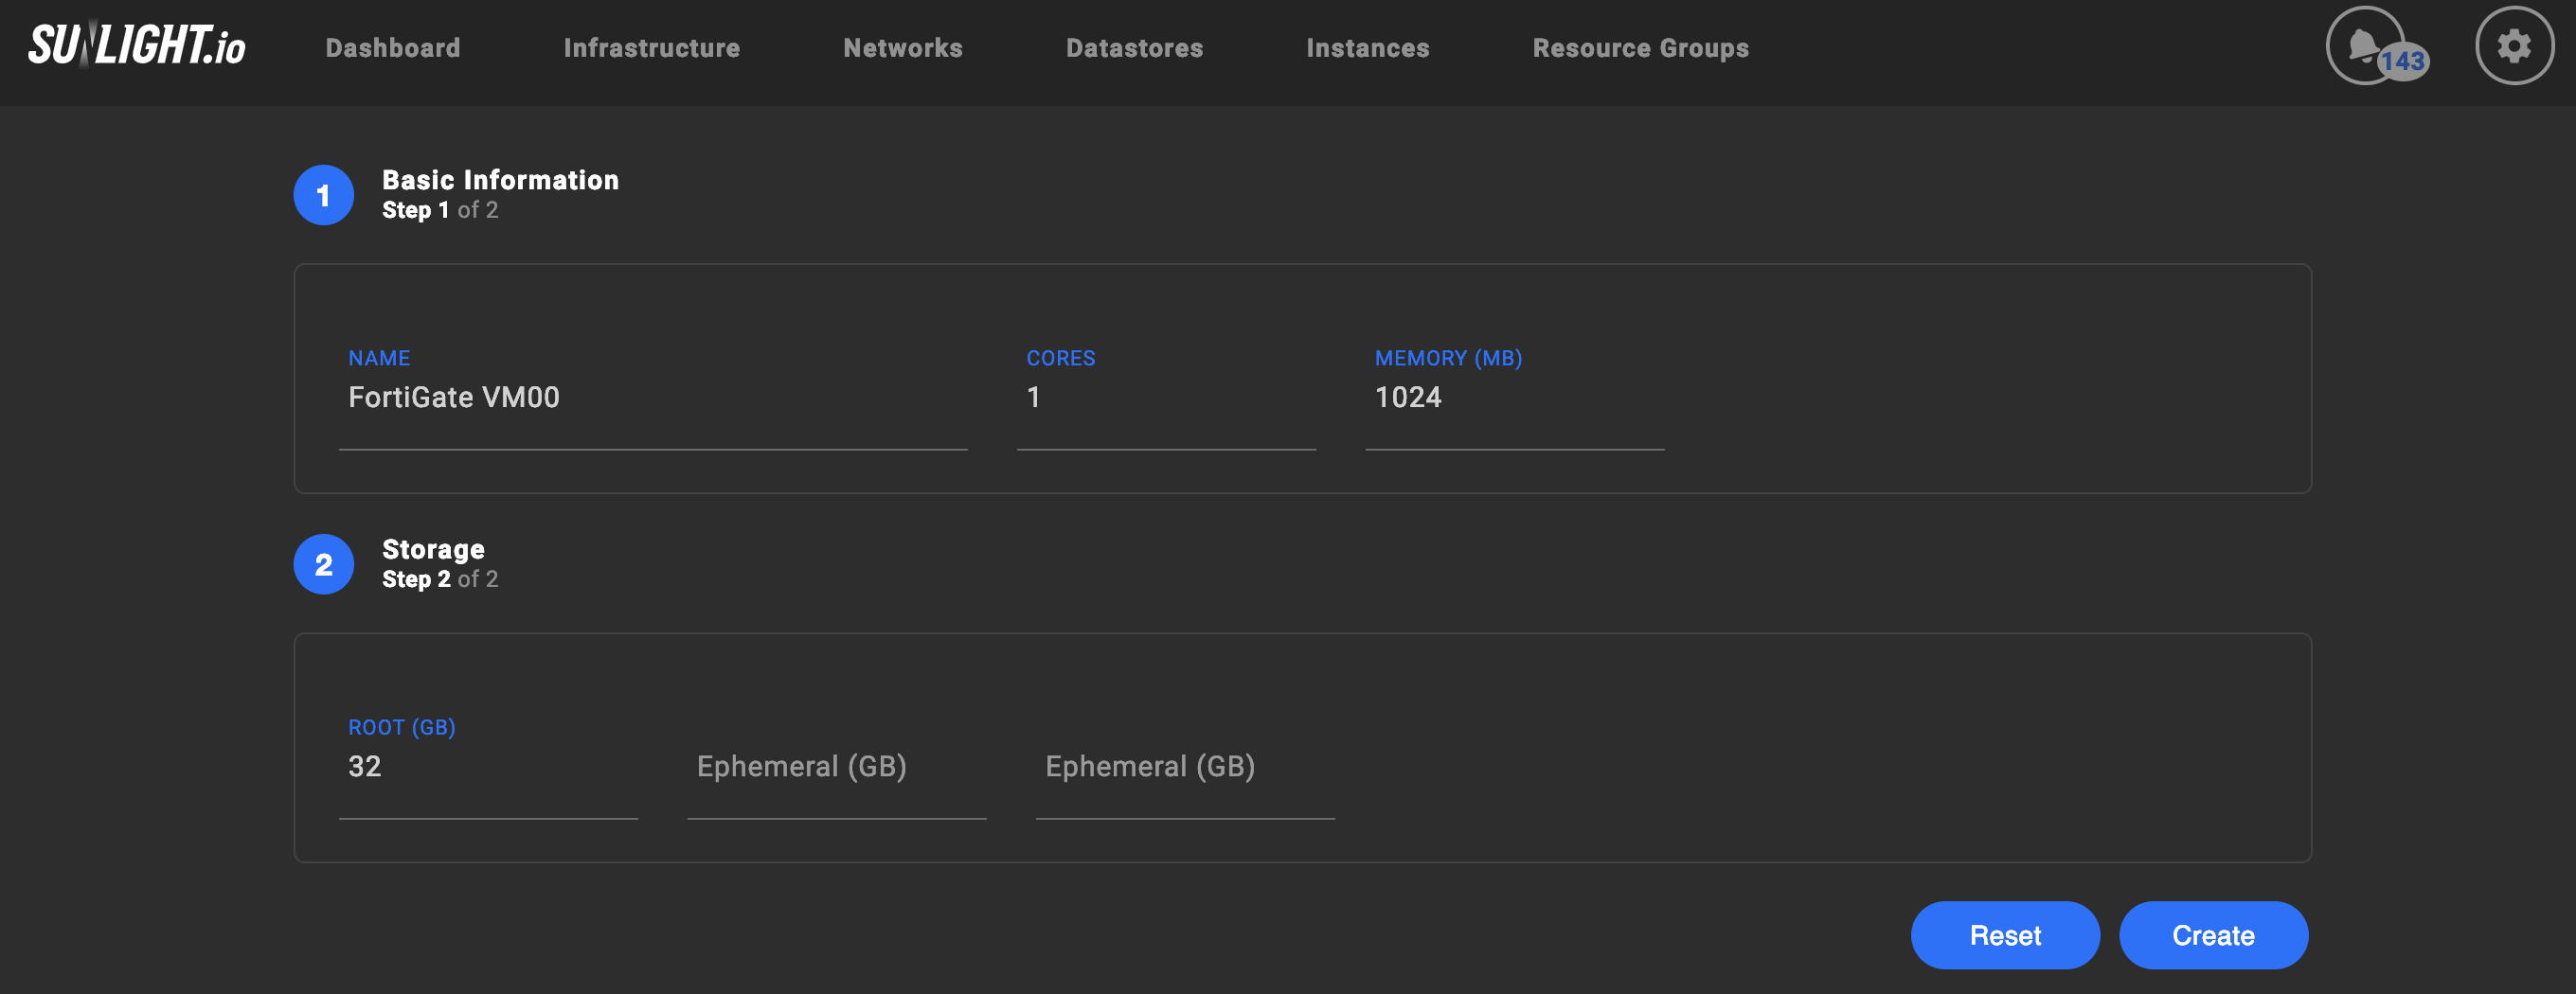
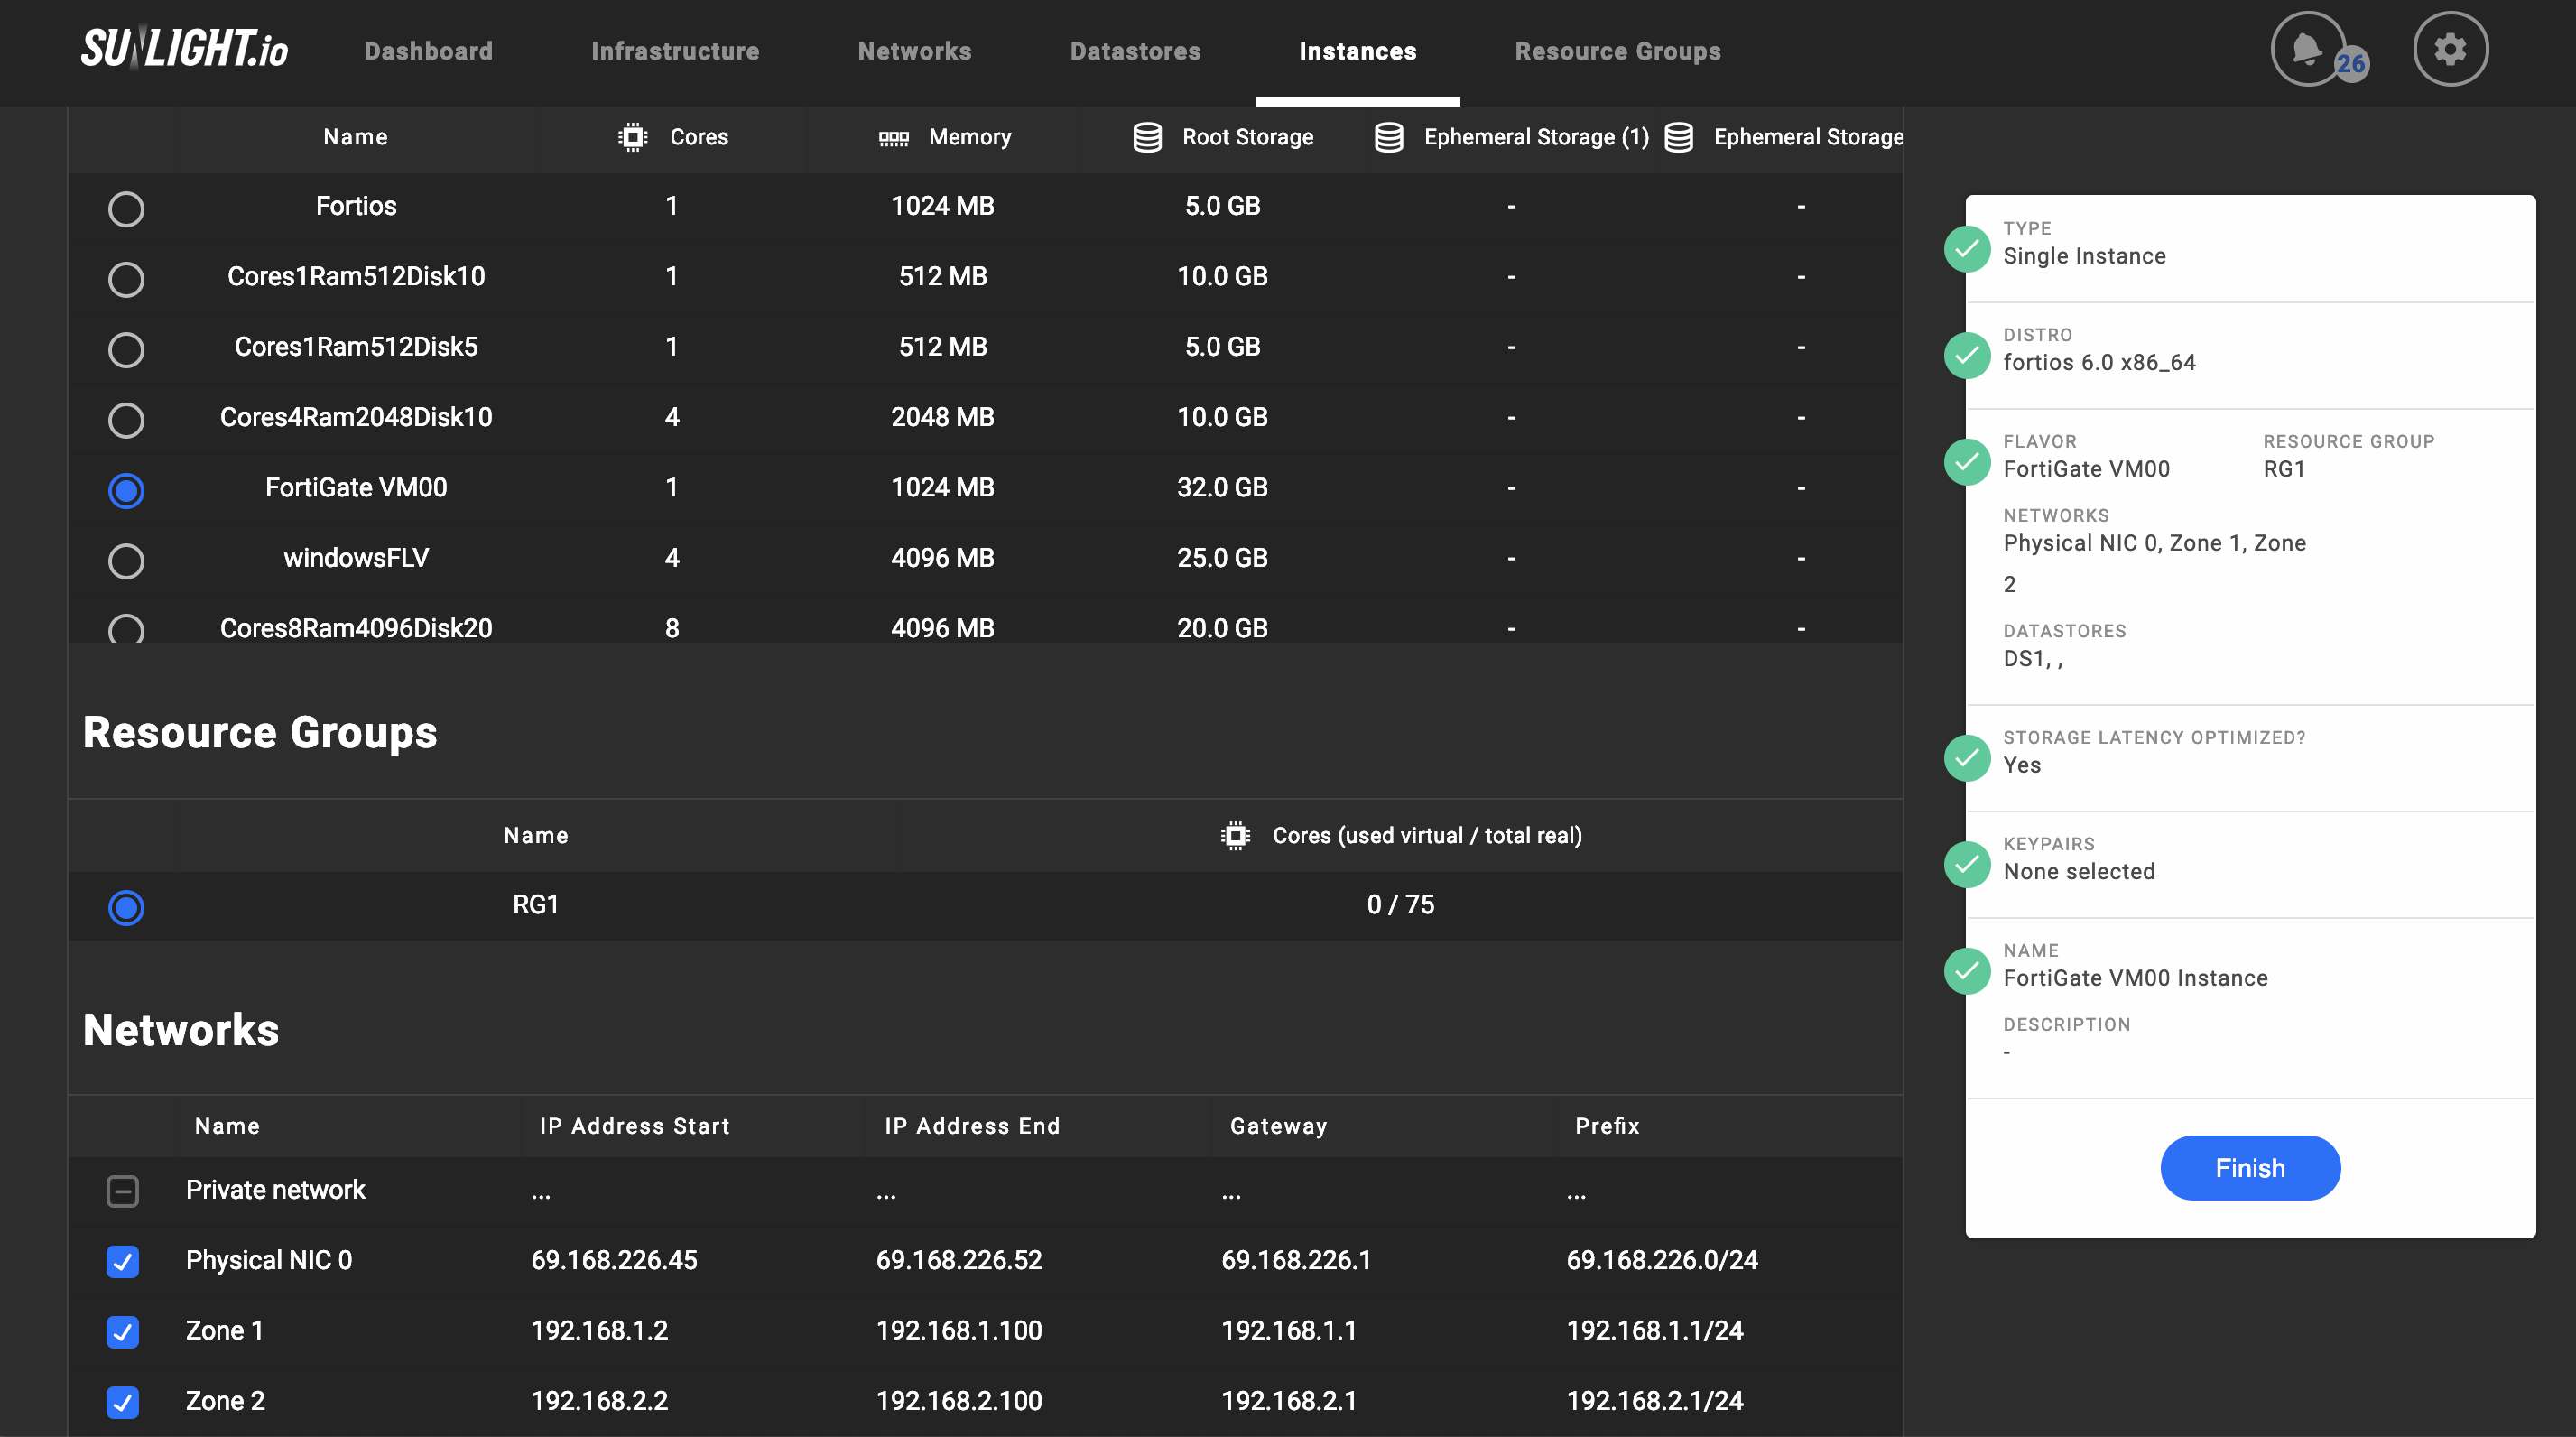
Create a flavour to match the capacity of the registered license. For example, the FortiGate VM00 flavour is configured according to the specification of the evaluation license.
-
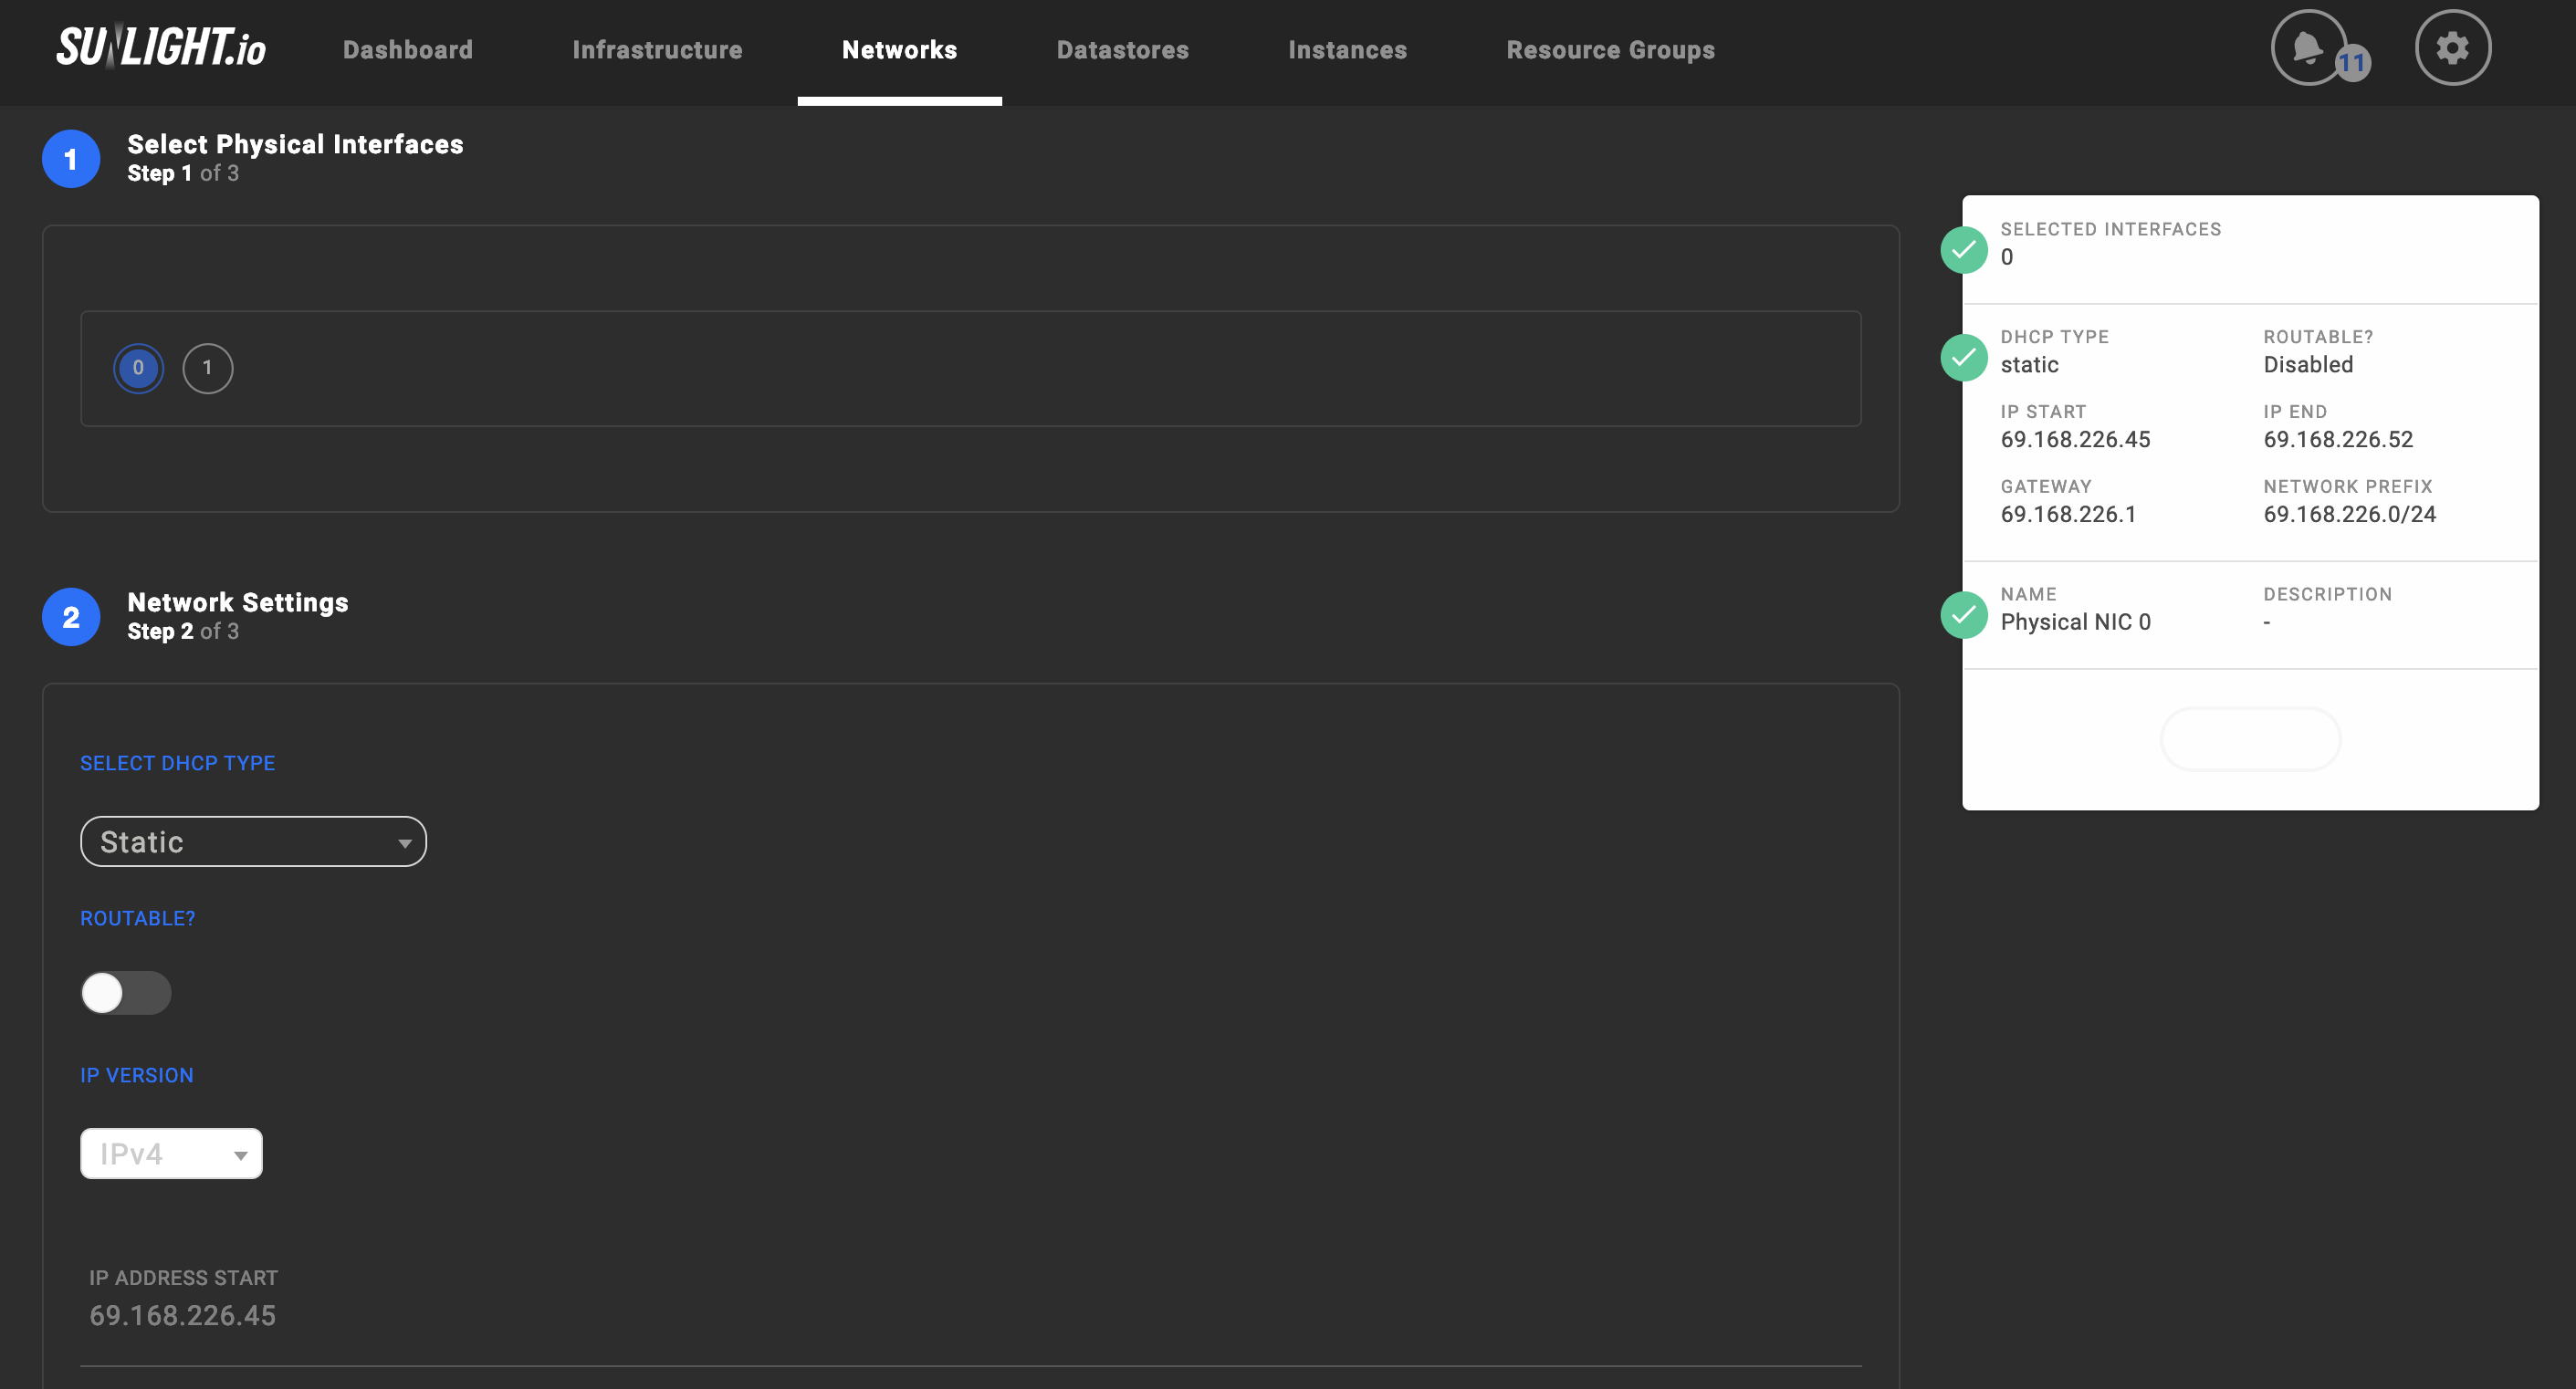
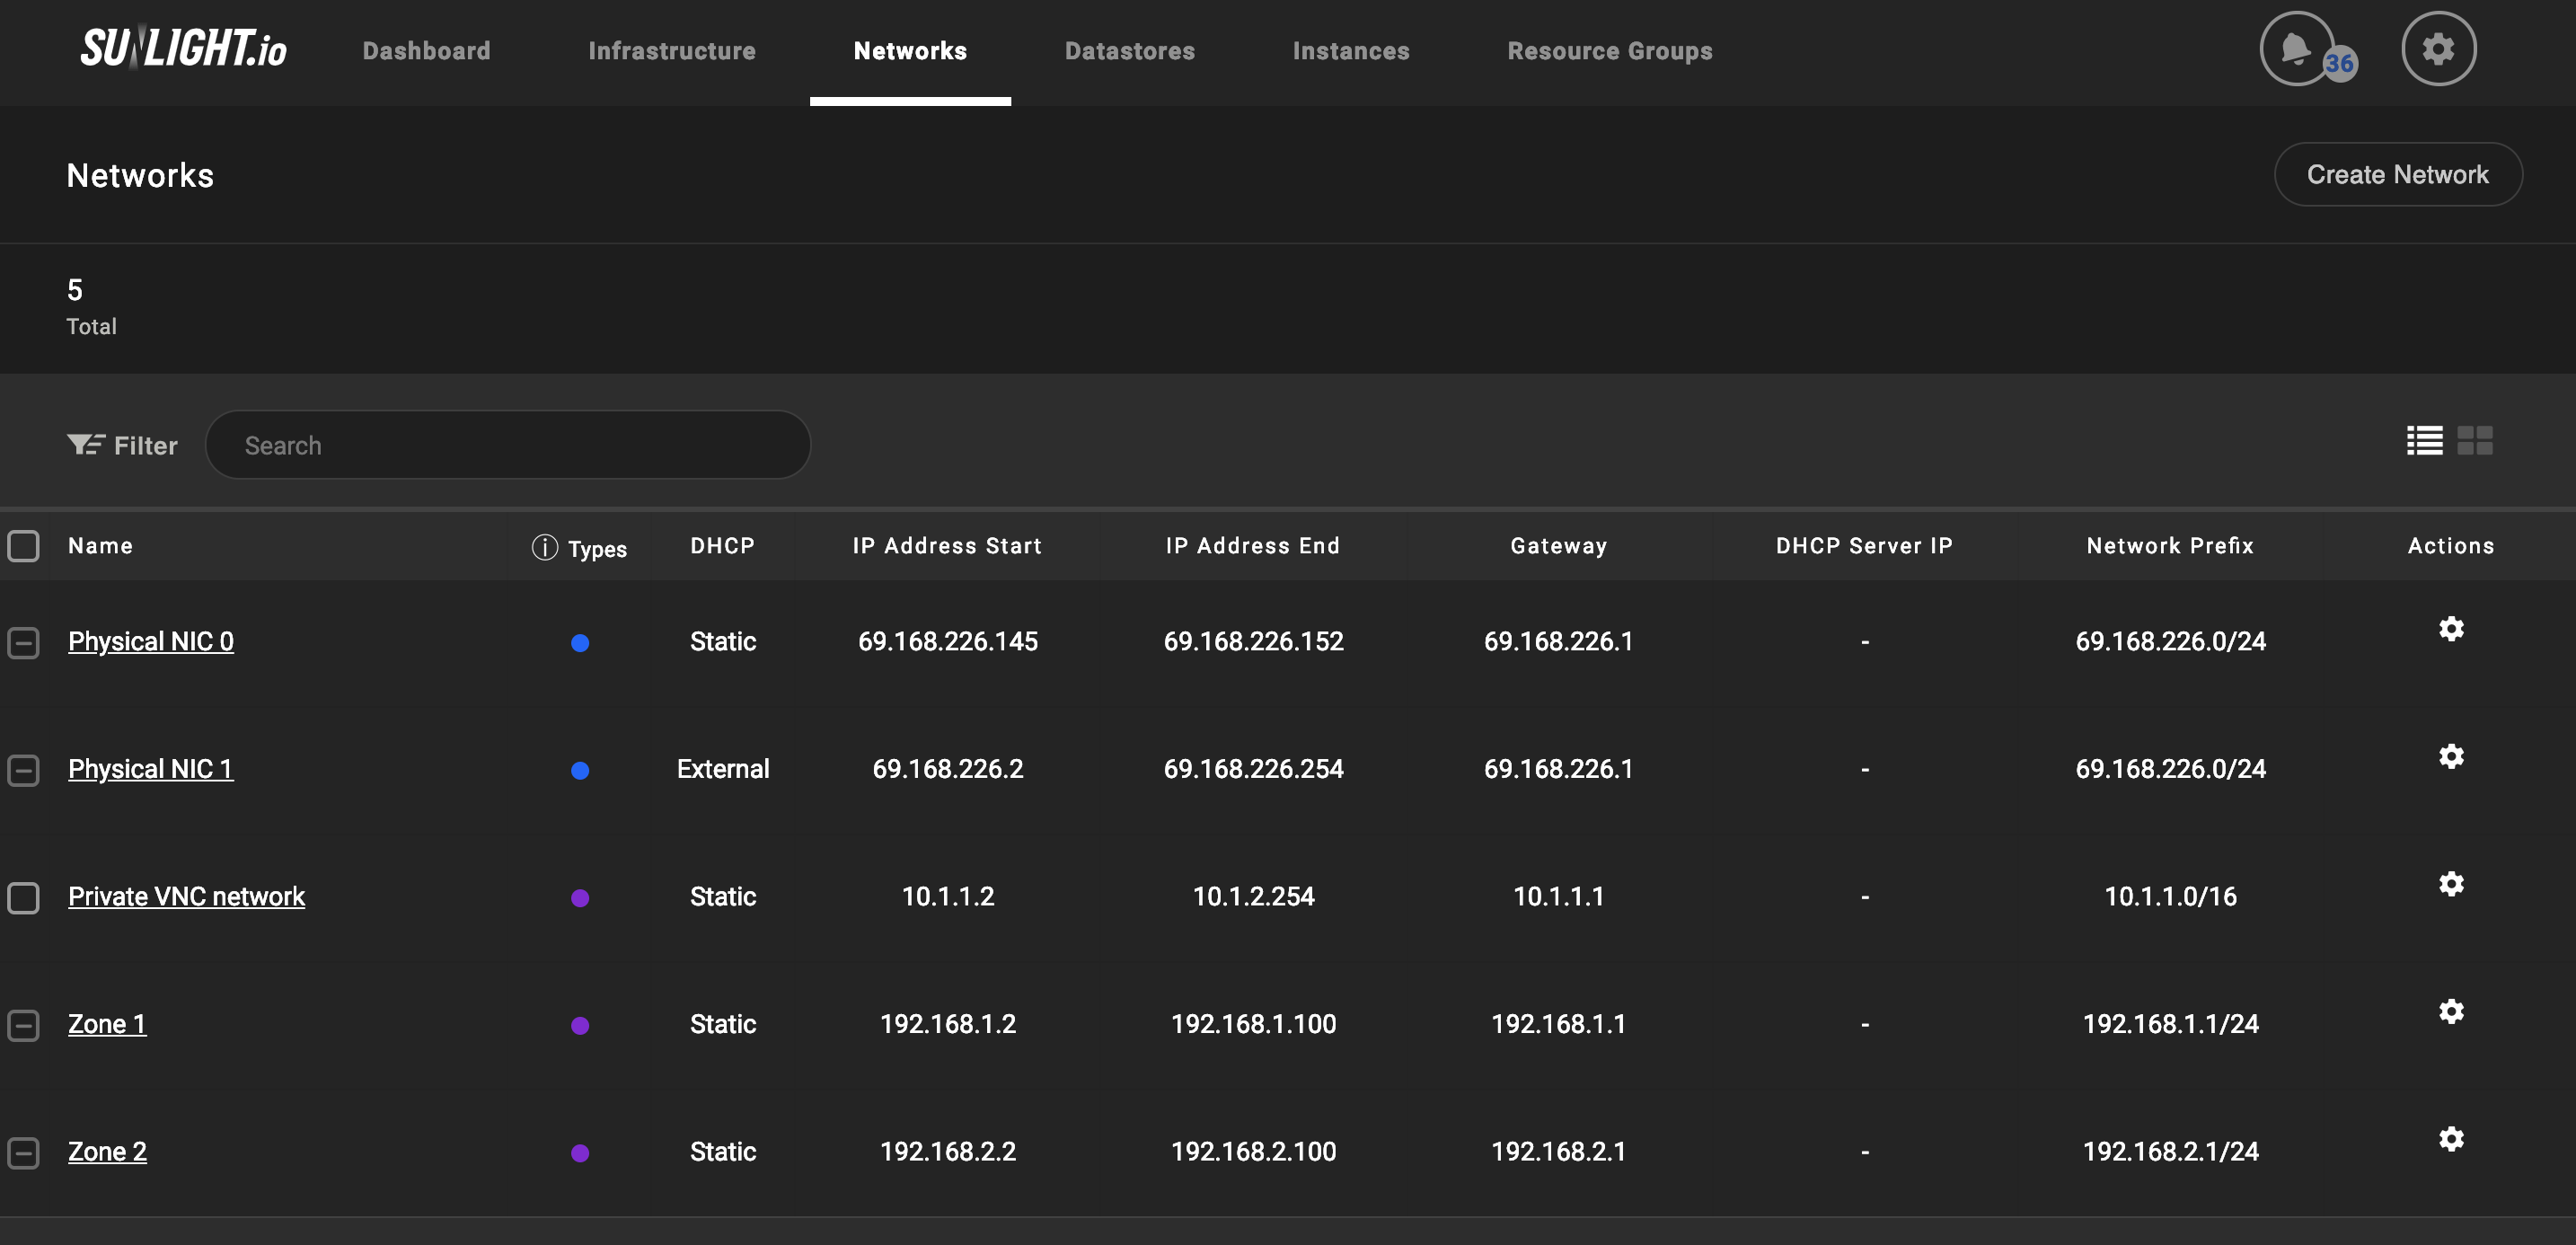
Create the virtual private networks matching the infrastructure's network environment and attach them to a physical network interface.
-
Create the instance by choosing the FortiGate image, the pre-created FortiGate flavour and the corresponding network.
-
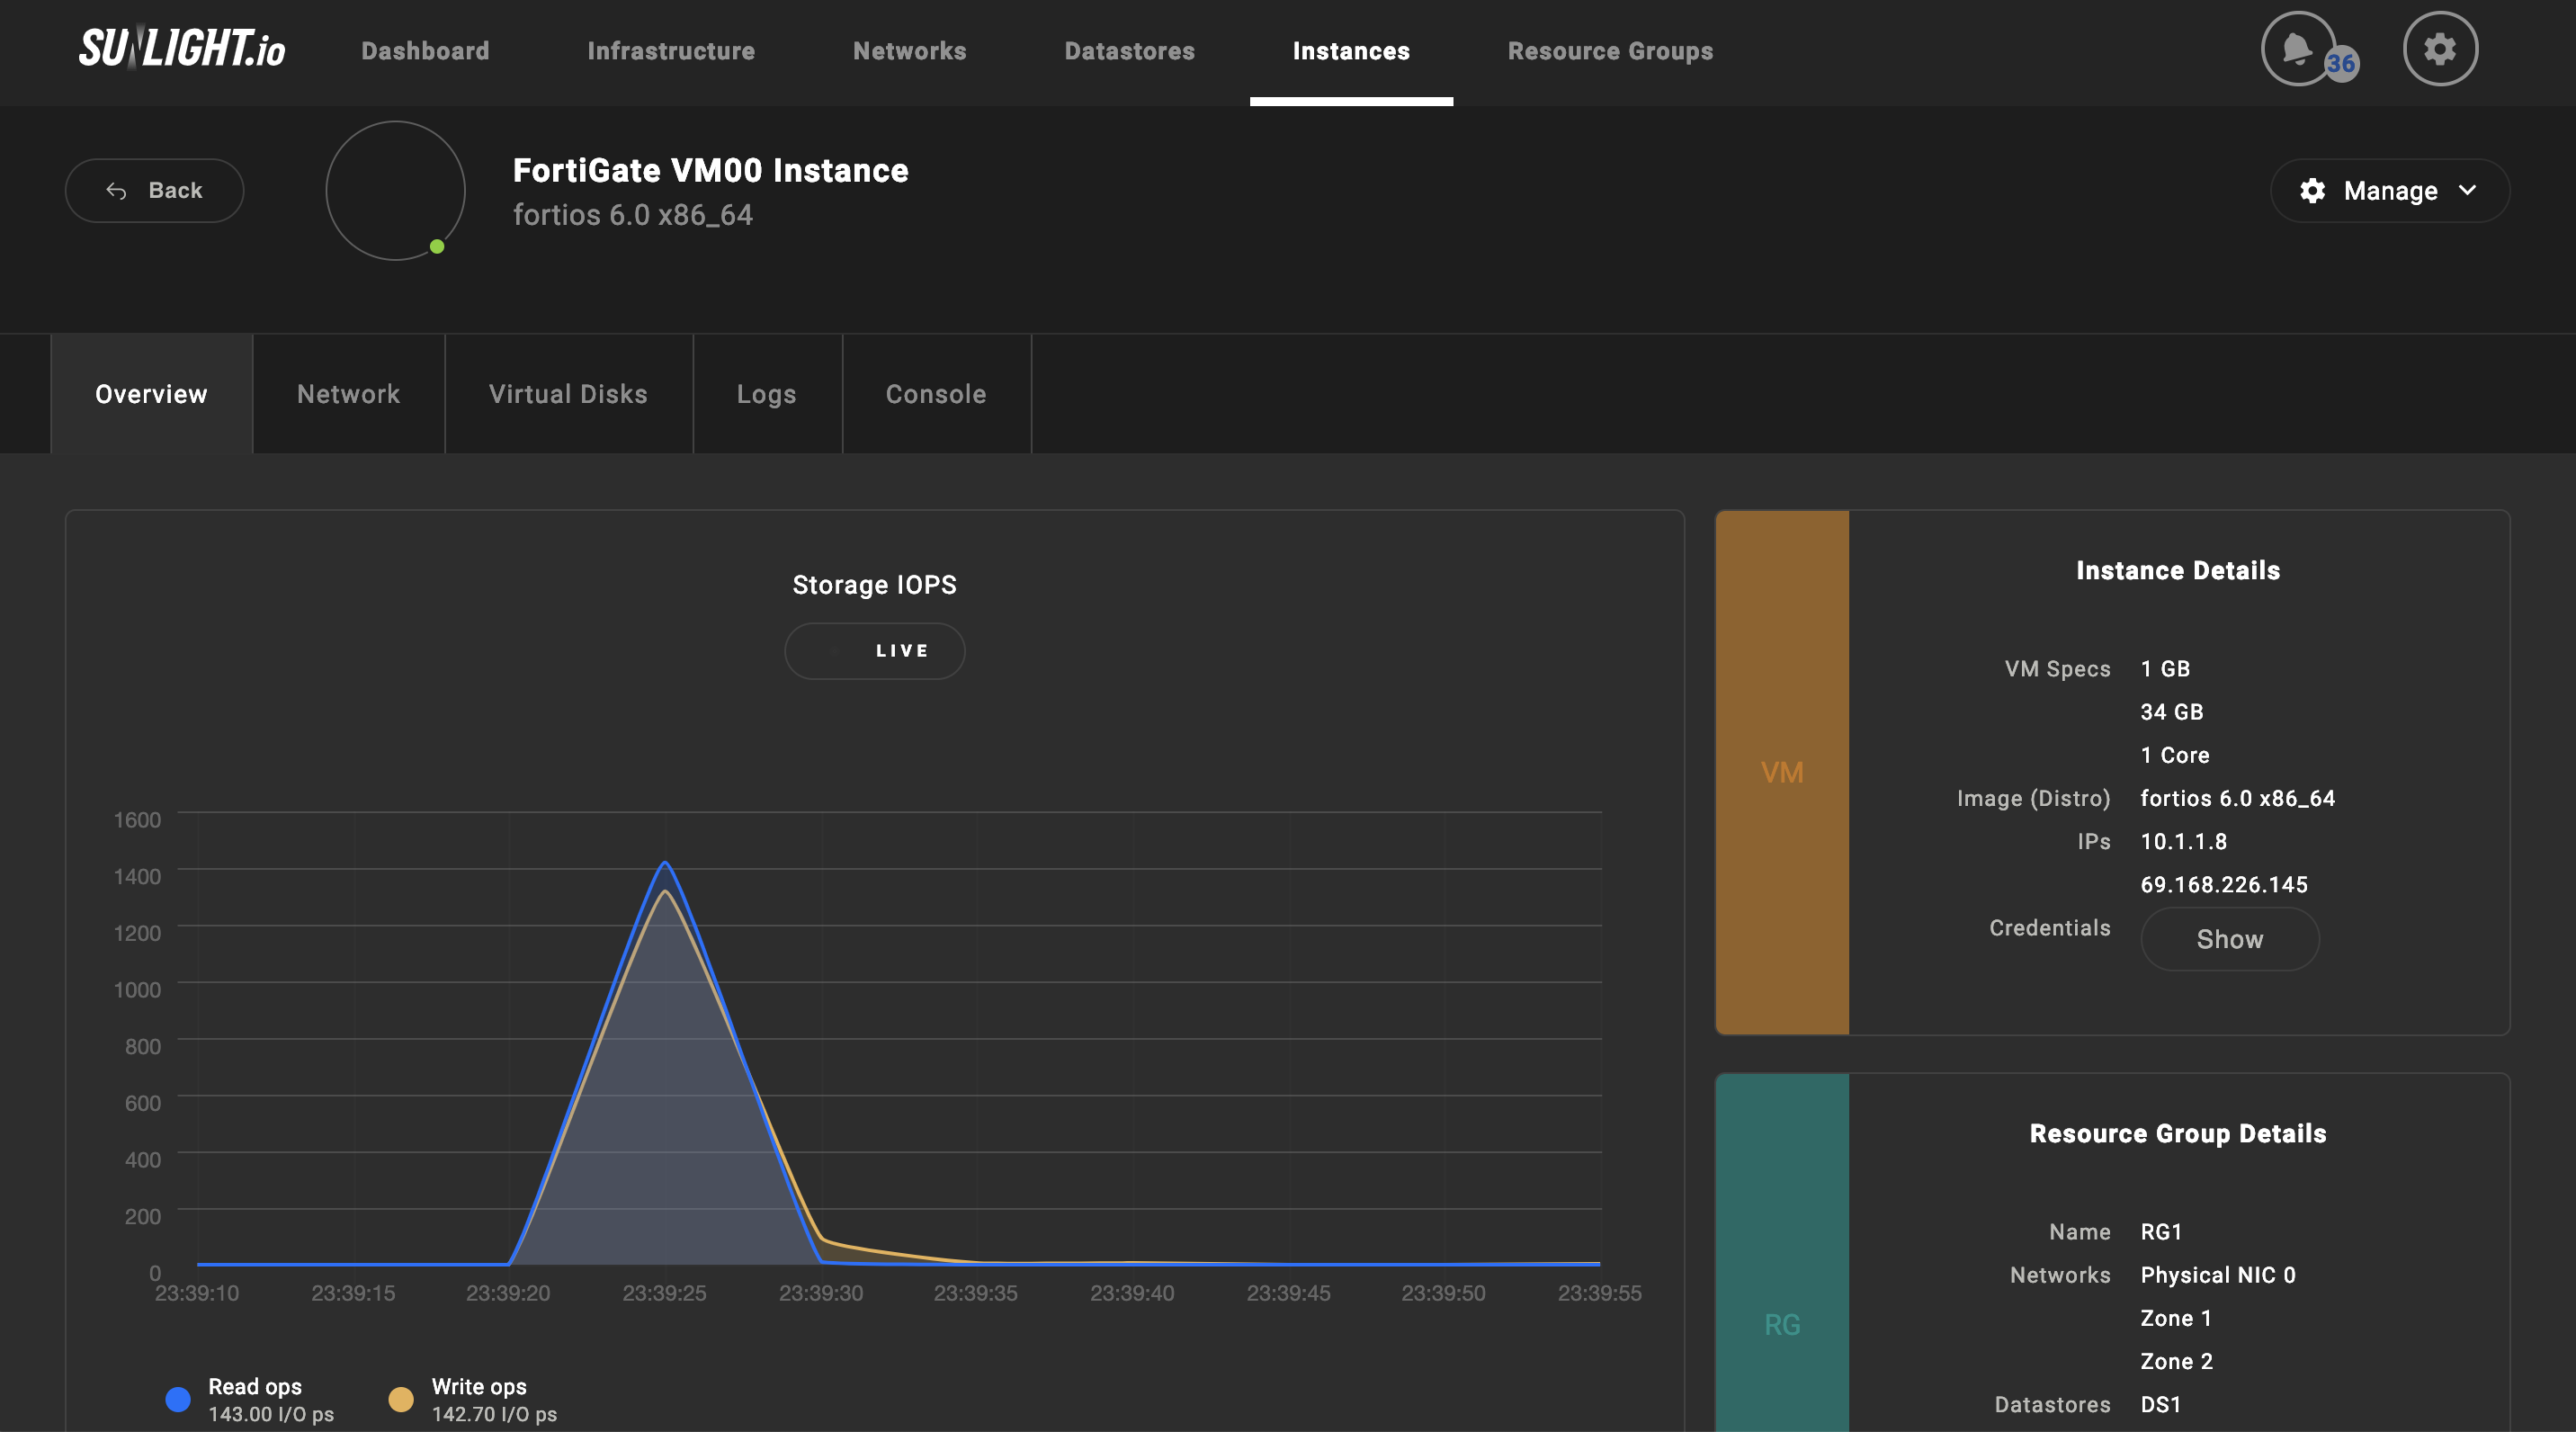
The FortiGate VM is available as soon as it is sucessfully generated.
Access the FortiGate VM
Before connecting to the FortiGate VM web-based manager, the network interface in the FortiGate VM console should be configured. Once an interface with administrative access is defined, the connection to the FortiGate VM web-based Manager is available, where the FortiGate VM license file (downloaded from the Customer Service & Support website) can be uploaded.
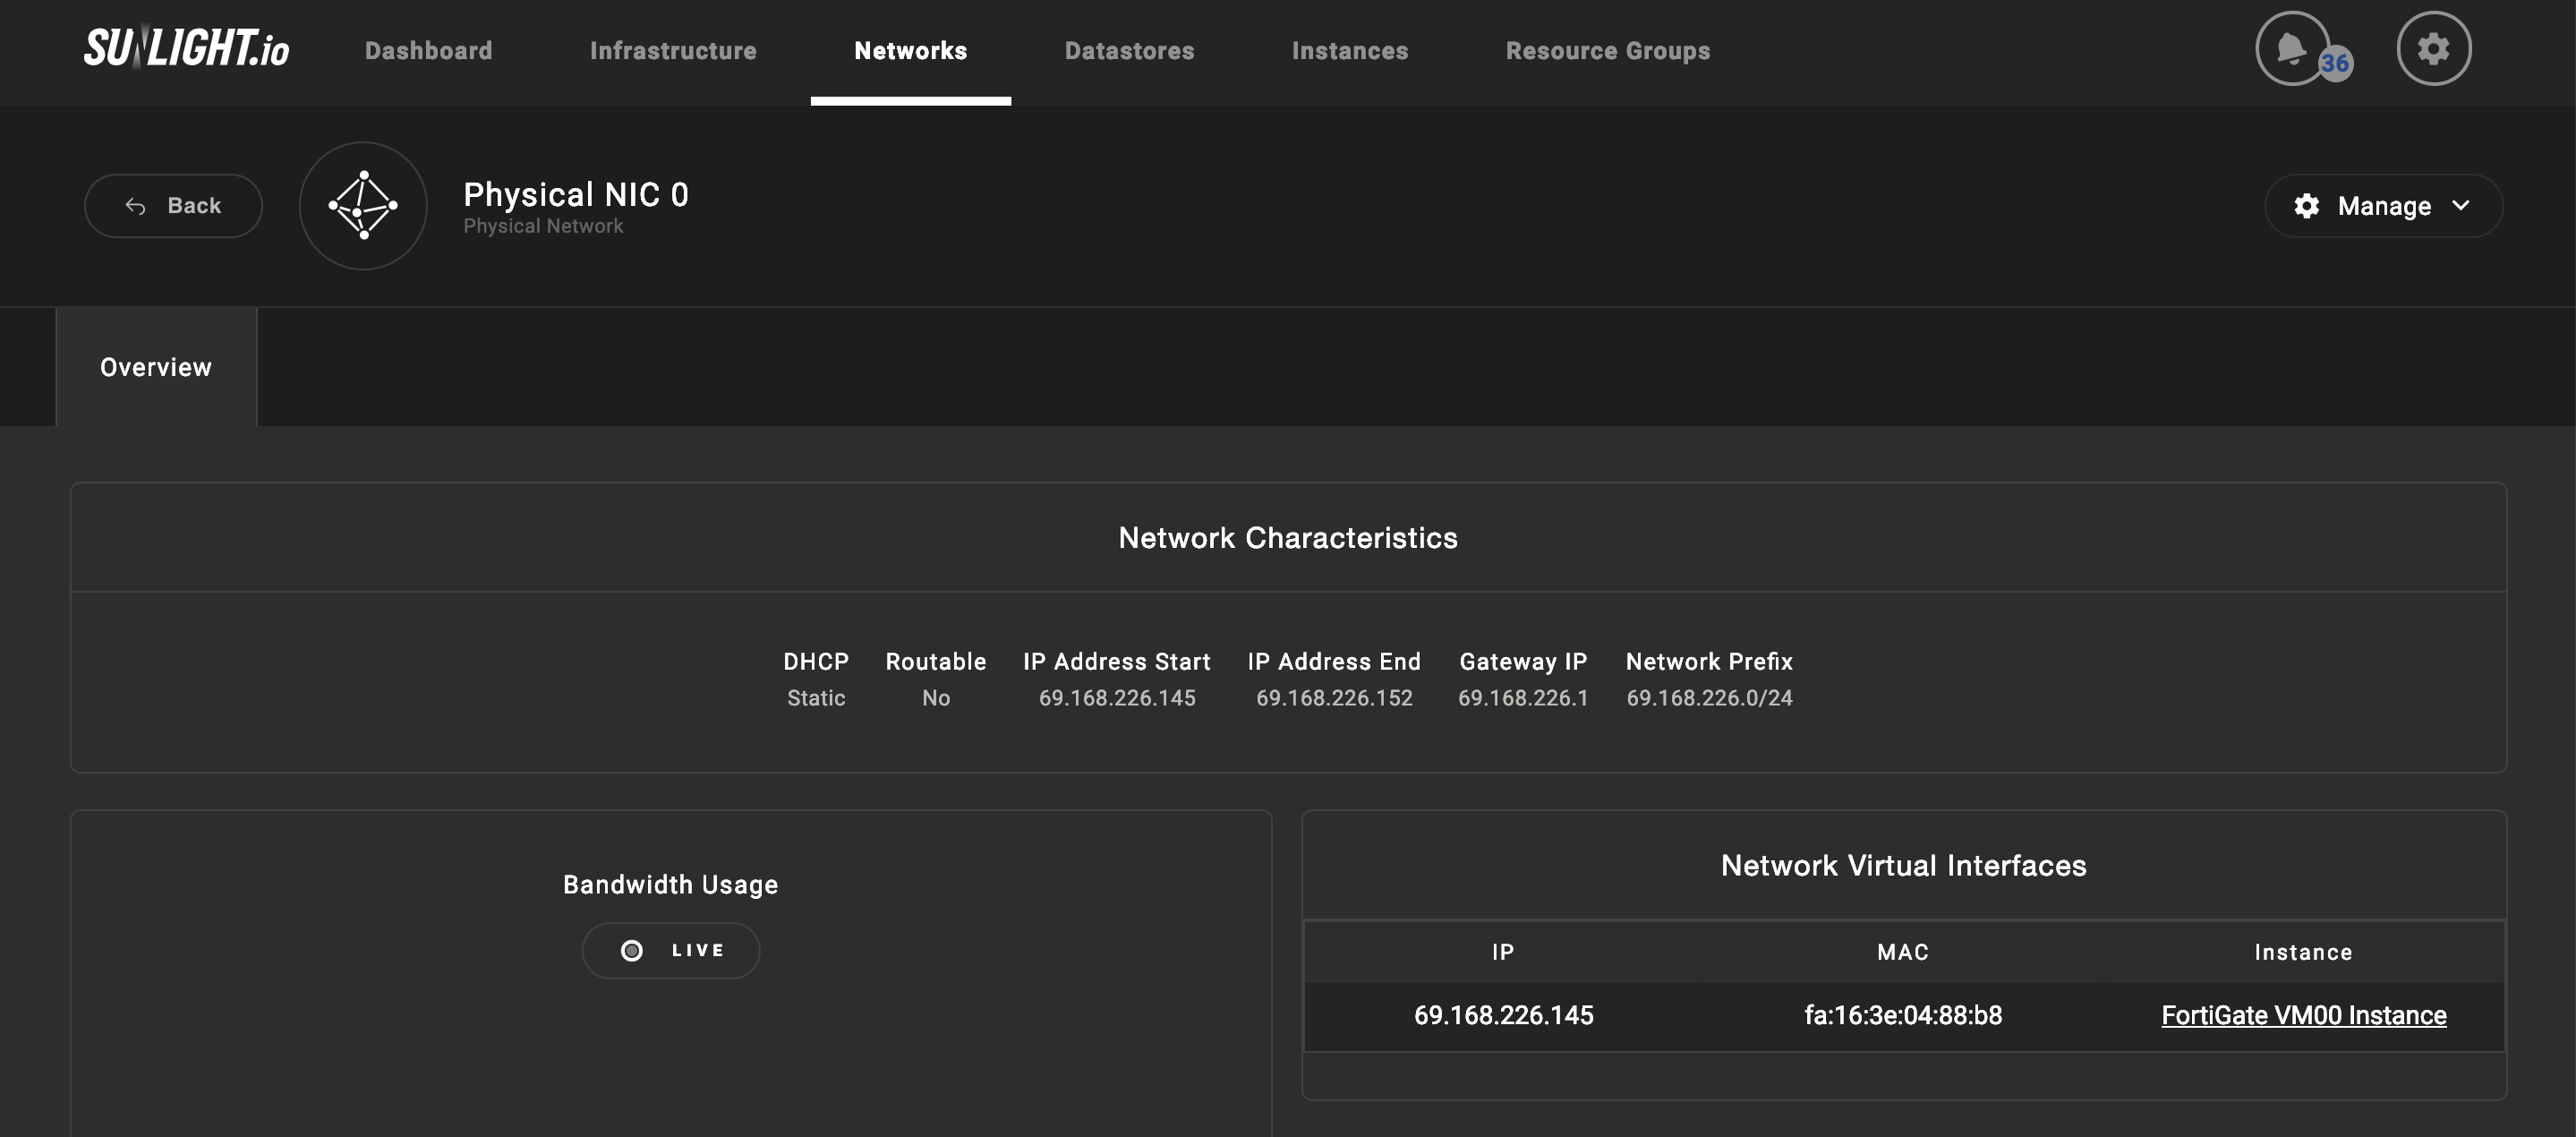
Set FortiGate VM port1 IP address
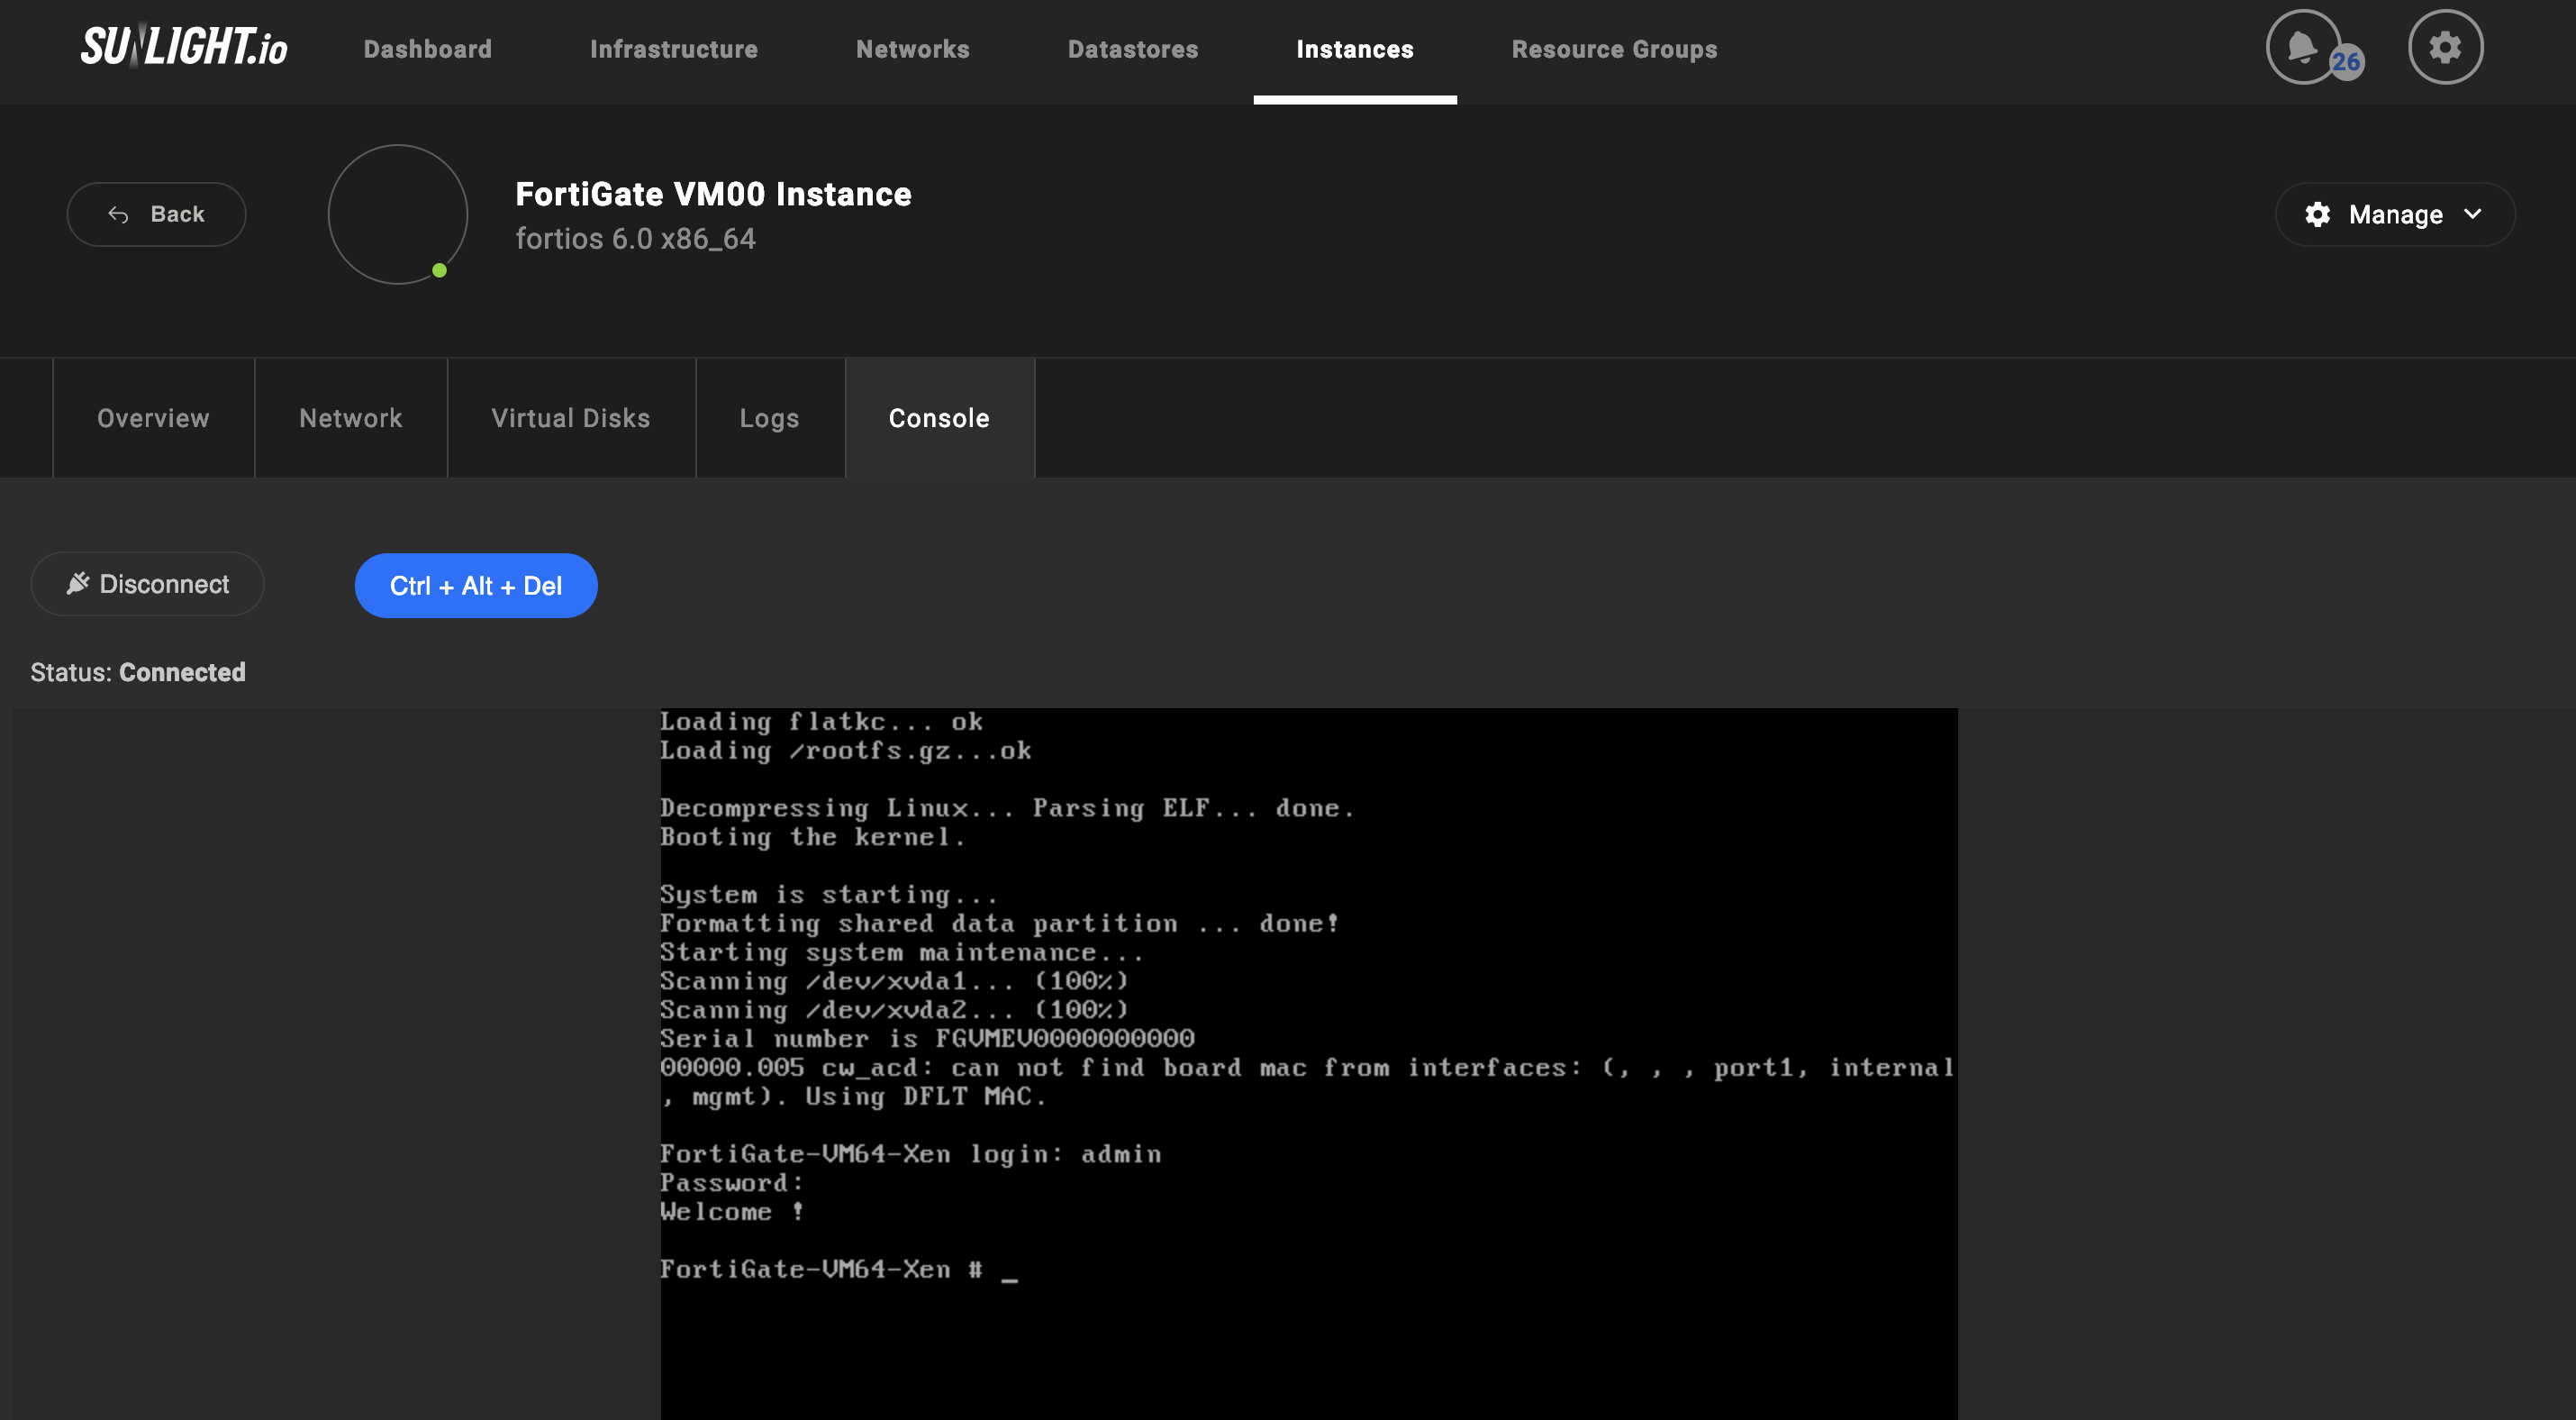
The Sunlight controller UI includes a guest console window. On the FortiGate VM, this essentially provides access to the FortiGate console, equivalent to the console port on a hardware FortiGate unit. Before accessing the Web-based manager, the FortiGate VM port1 with an IP address and administrative access should be configured, by following the steps below:
-
On the Sunlight controller UI, start the FortiGate VM and access the console window under the “Console” tab. Select “Connect” to initiate the console window. Please make sure to press enter, in case no login screen appears.
-
At the FortiGate VM login prompt insert "admin" as the username. By default, no password is required. Press Enter in order to proceed.
-
Port1 IP address and netmask can be configured by using CLI commands. In case Fortigate VM license is pending, the HTTP access must be enabled, in order to support low-strenght encryption. Please note that in this case, HTTPS will not be available.
config system interfaceedit port1set ip 192.168.0.100 255.255.255.0append allowaccess httpend -
The default gateway should also be configured with an IPv4 address. FortiGate VM requires internet access, in order to contact the FortiGuard Distribution Network (FDN)for the license validation process. Please enter the following CLI commands for configuring the default gateway.
config router staticedit 1set device port1set gateway <class_ip>end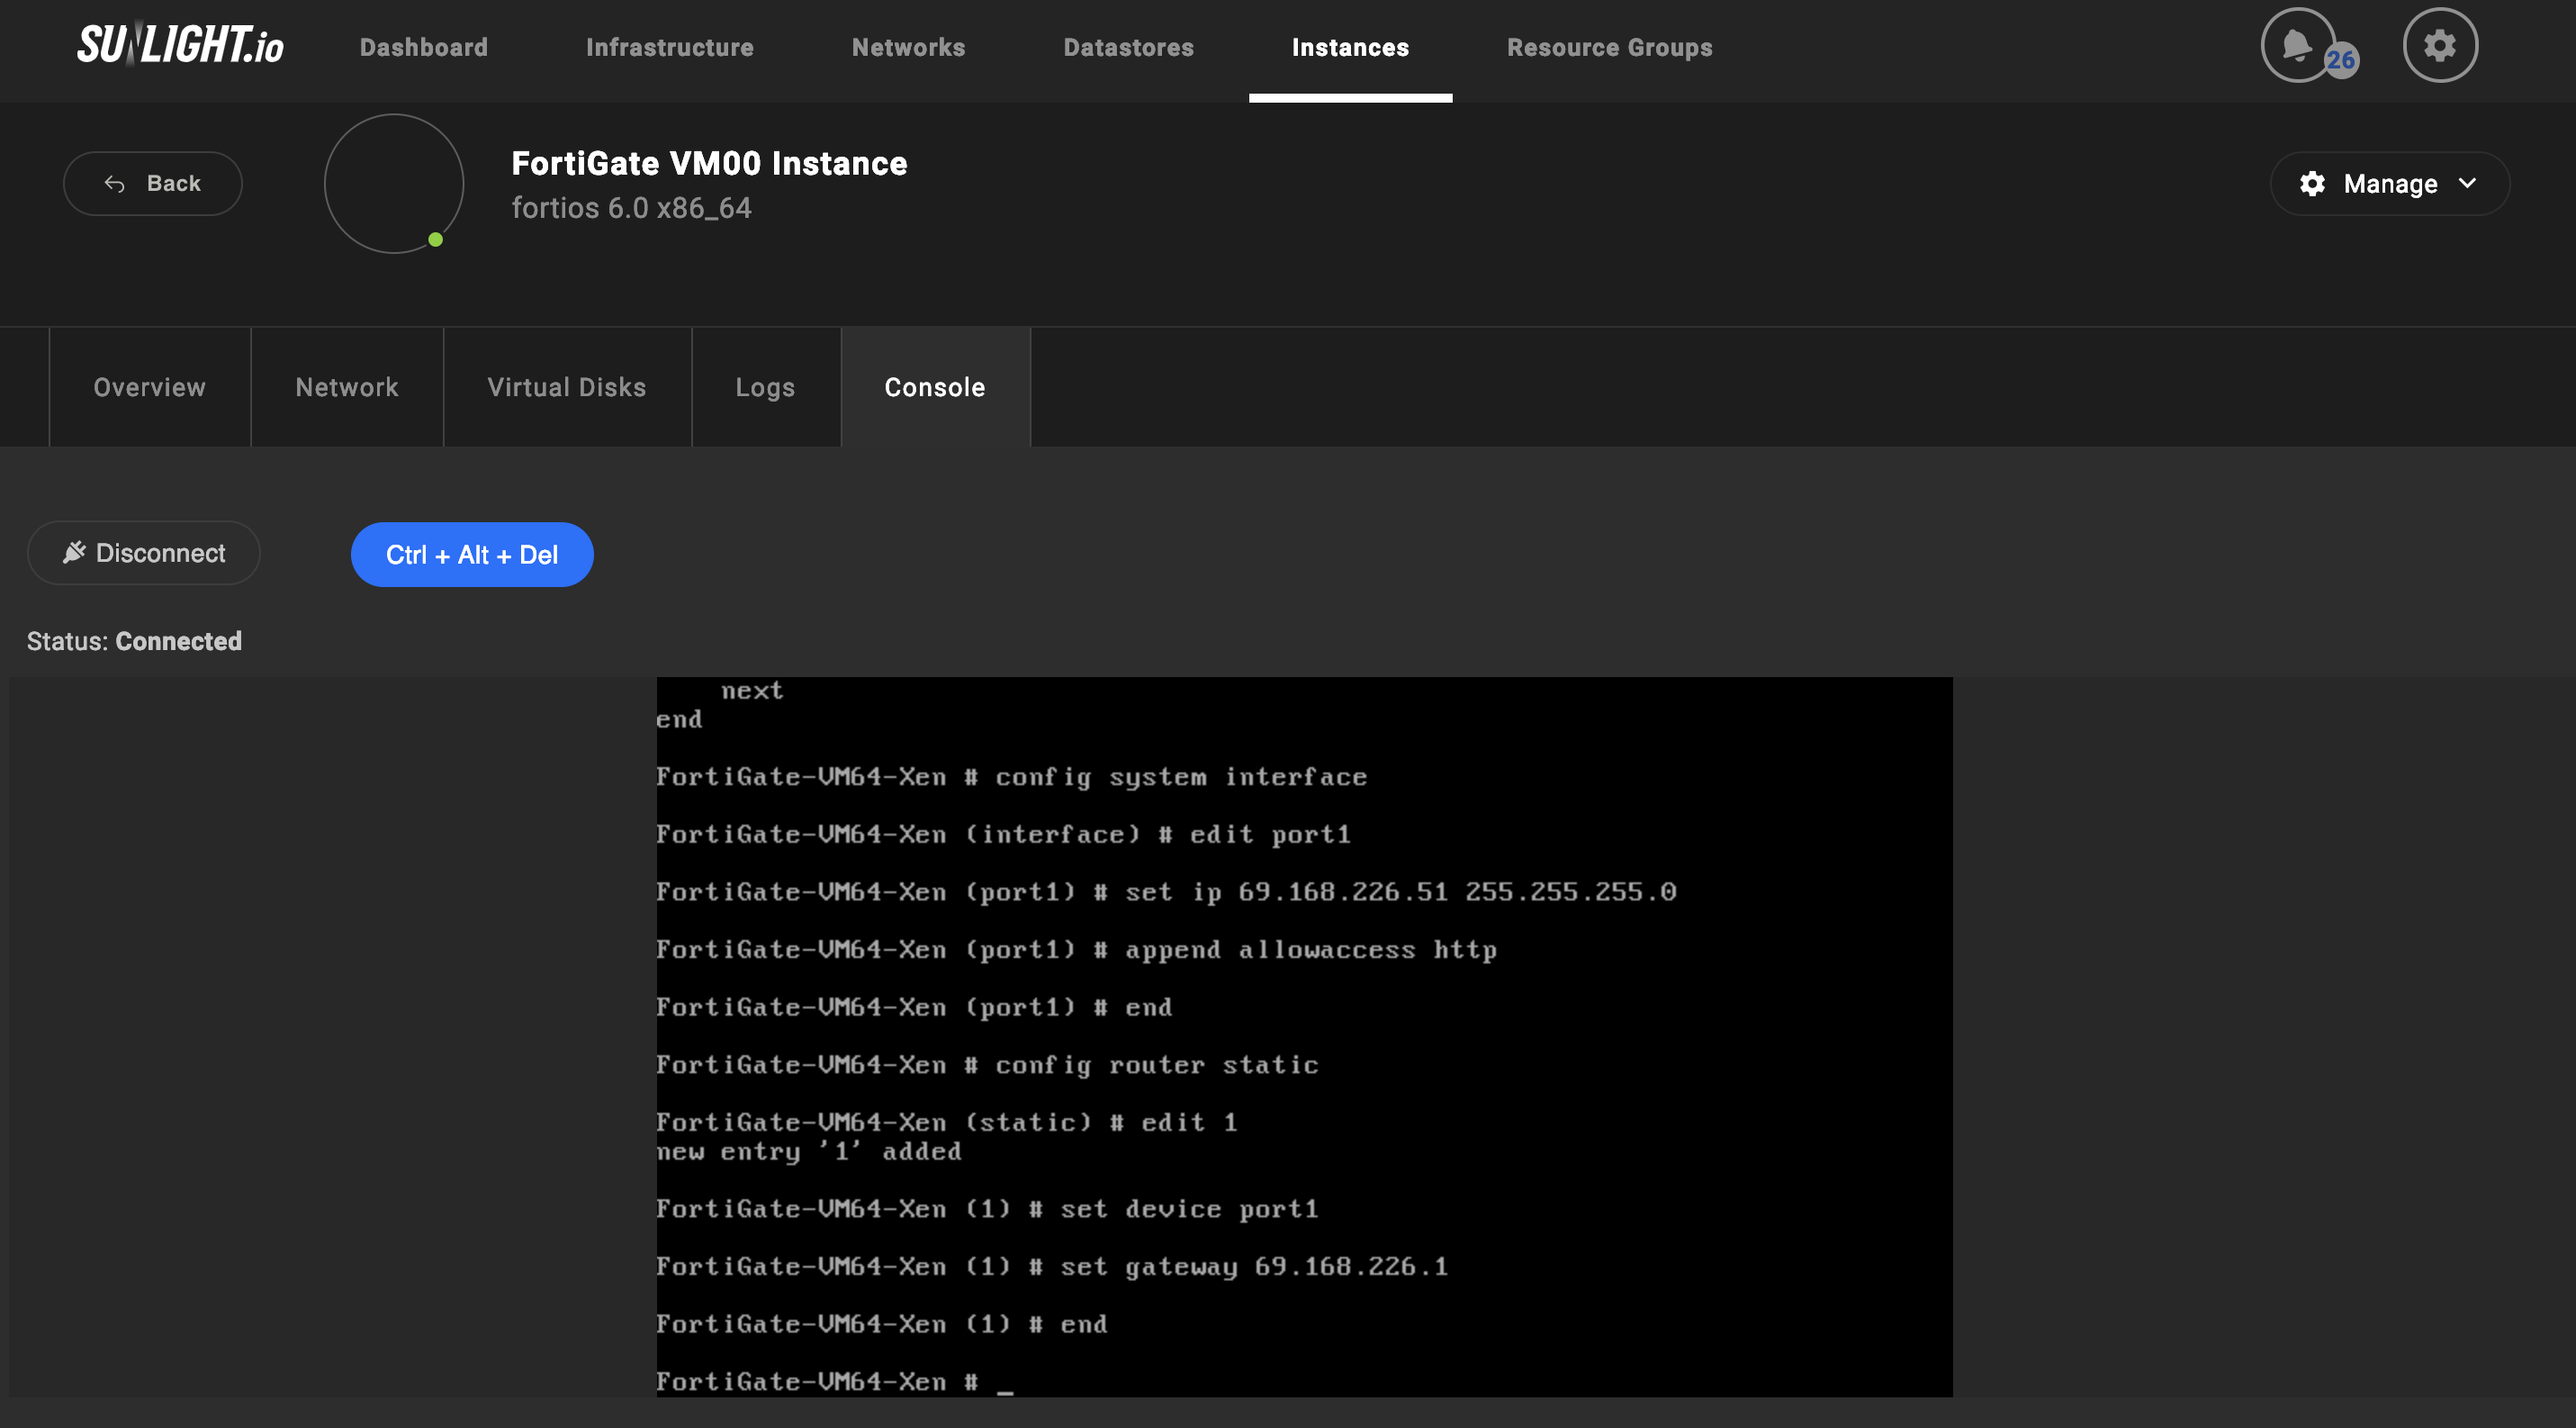
Connect to the FortiGate VM web-based manager
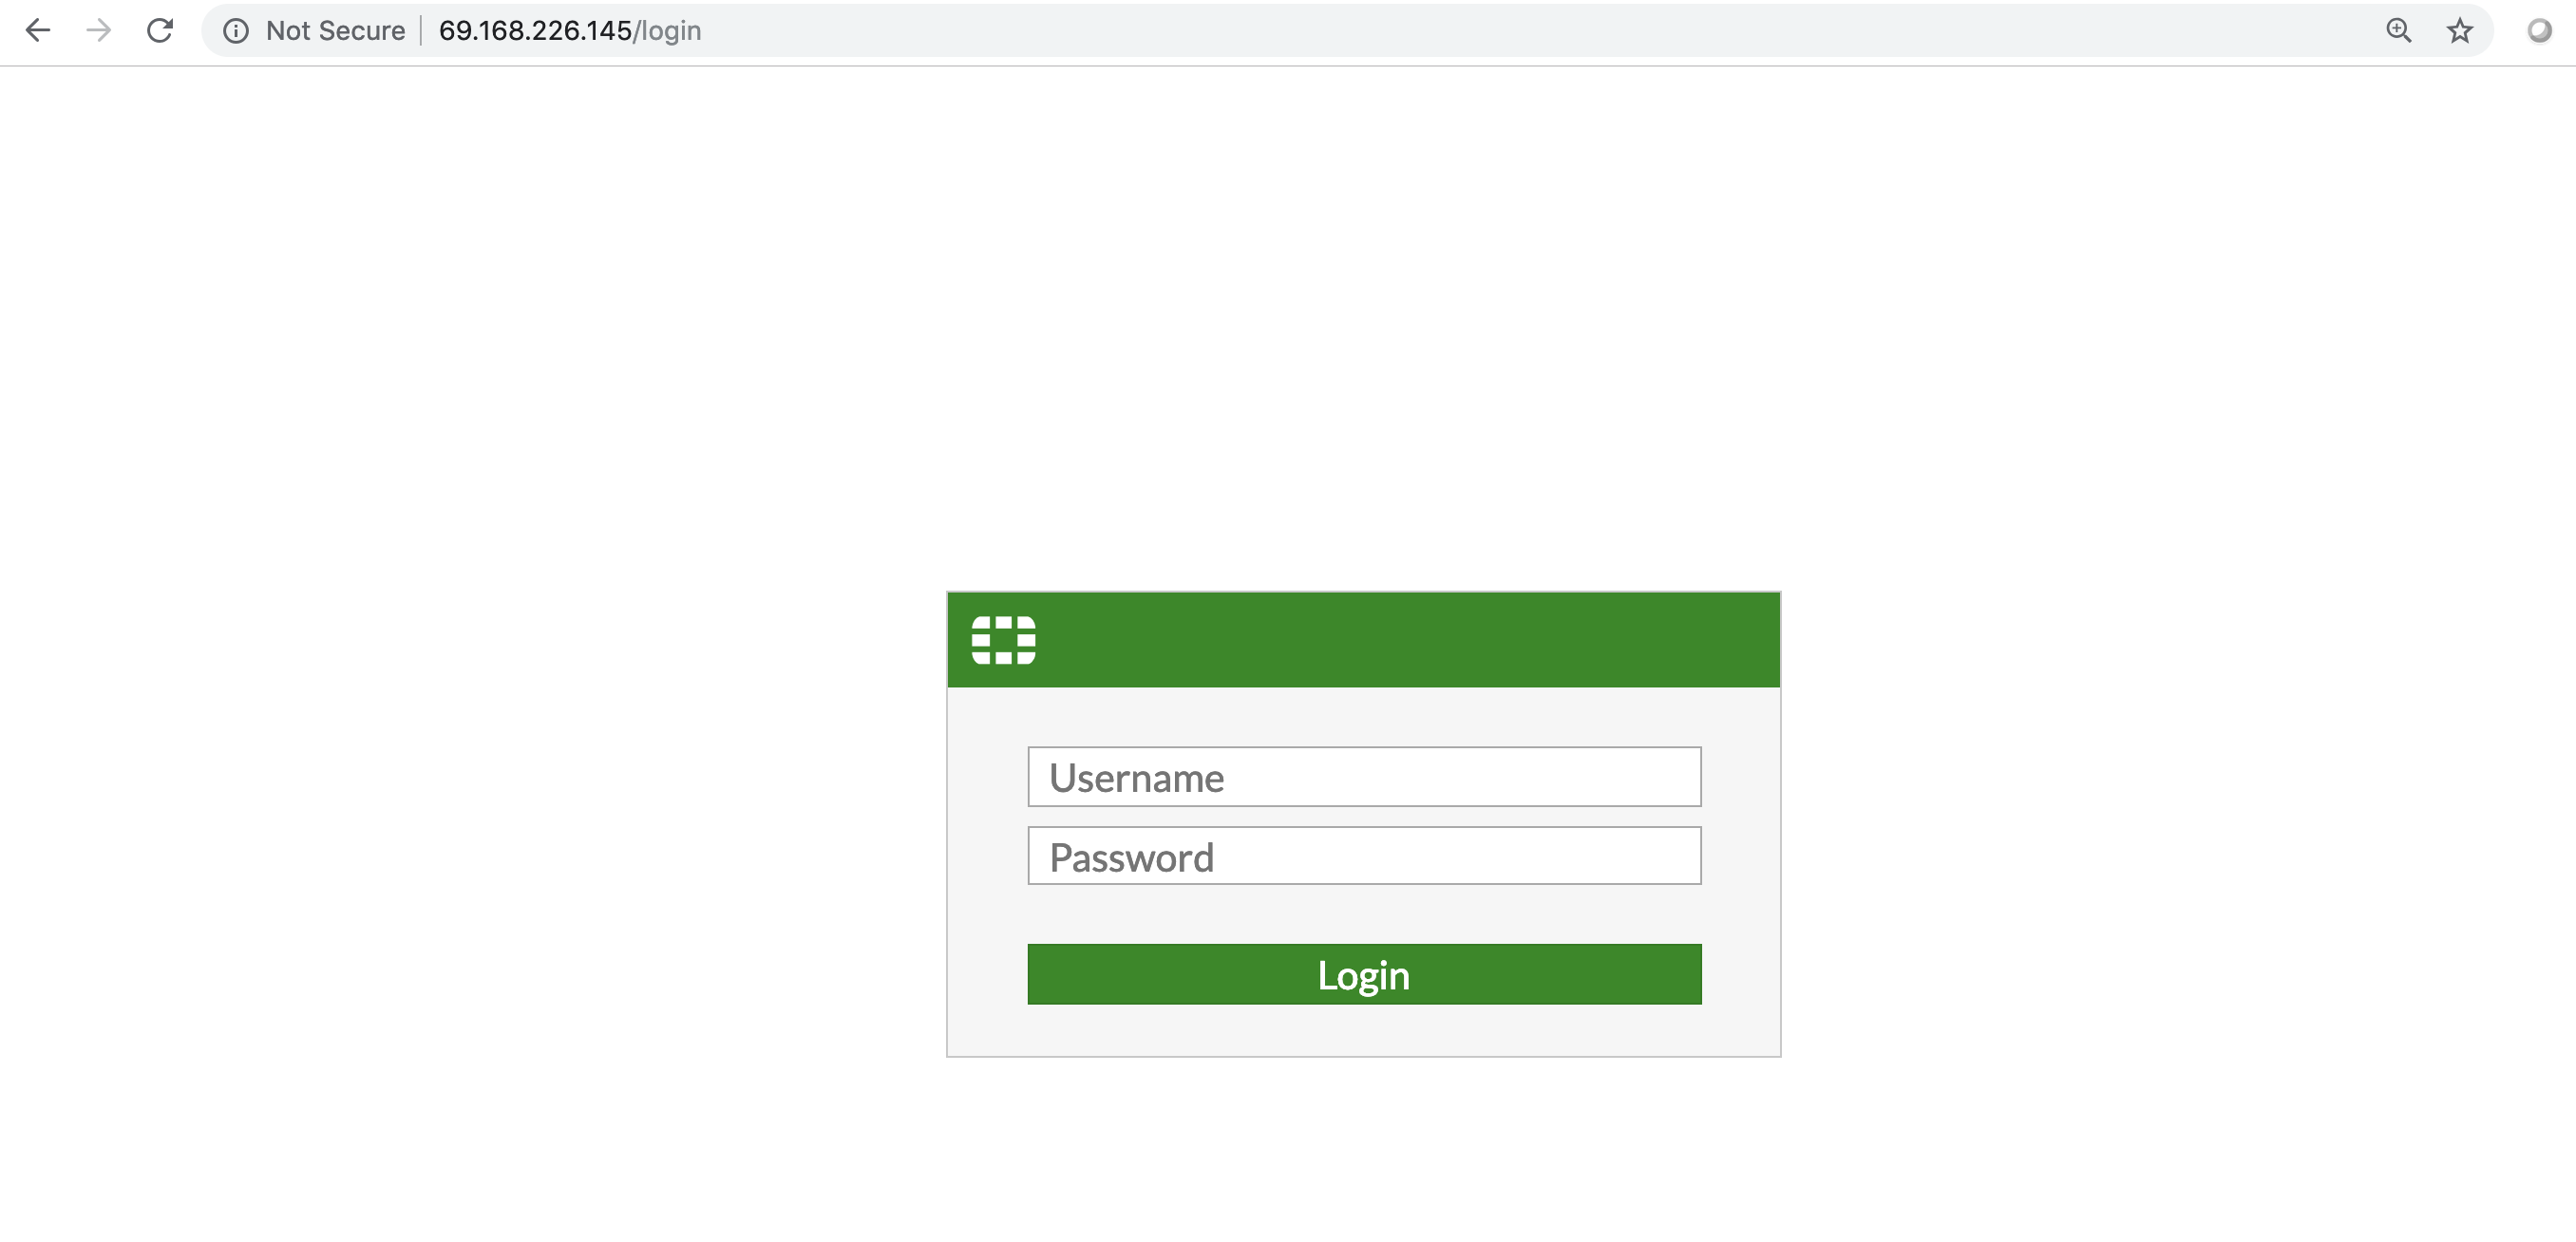
Following the configuration of the port1 IP address and netmask, launch a web browser and enter the IP address that was configured for port1.
-
At the login page, enter "admin" as the username and leave the password field empty, since there is no default password. Please select Login for access.
-
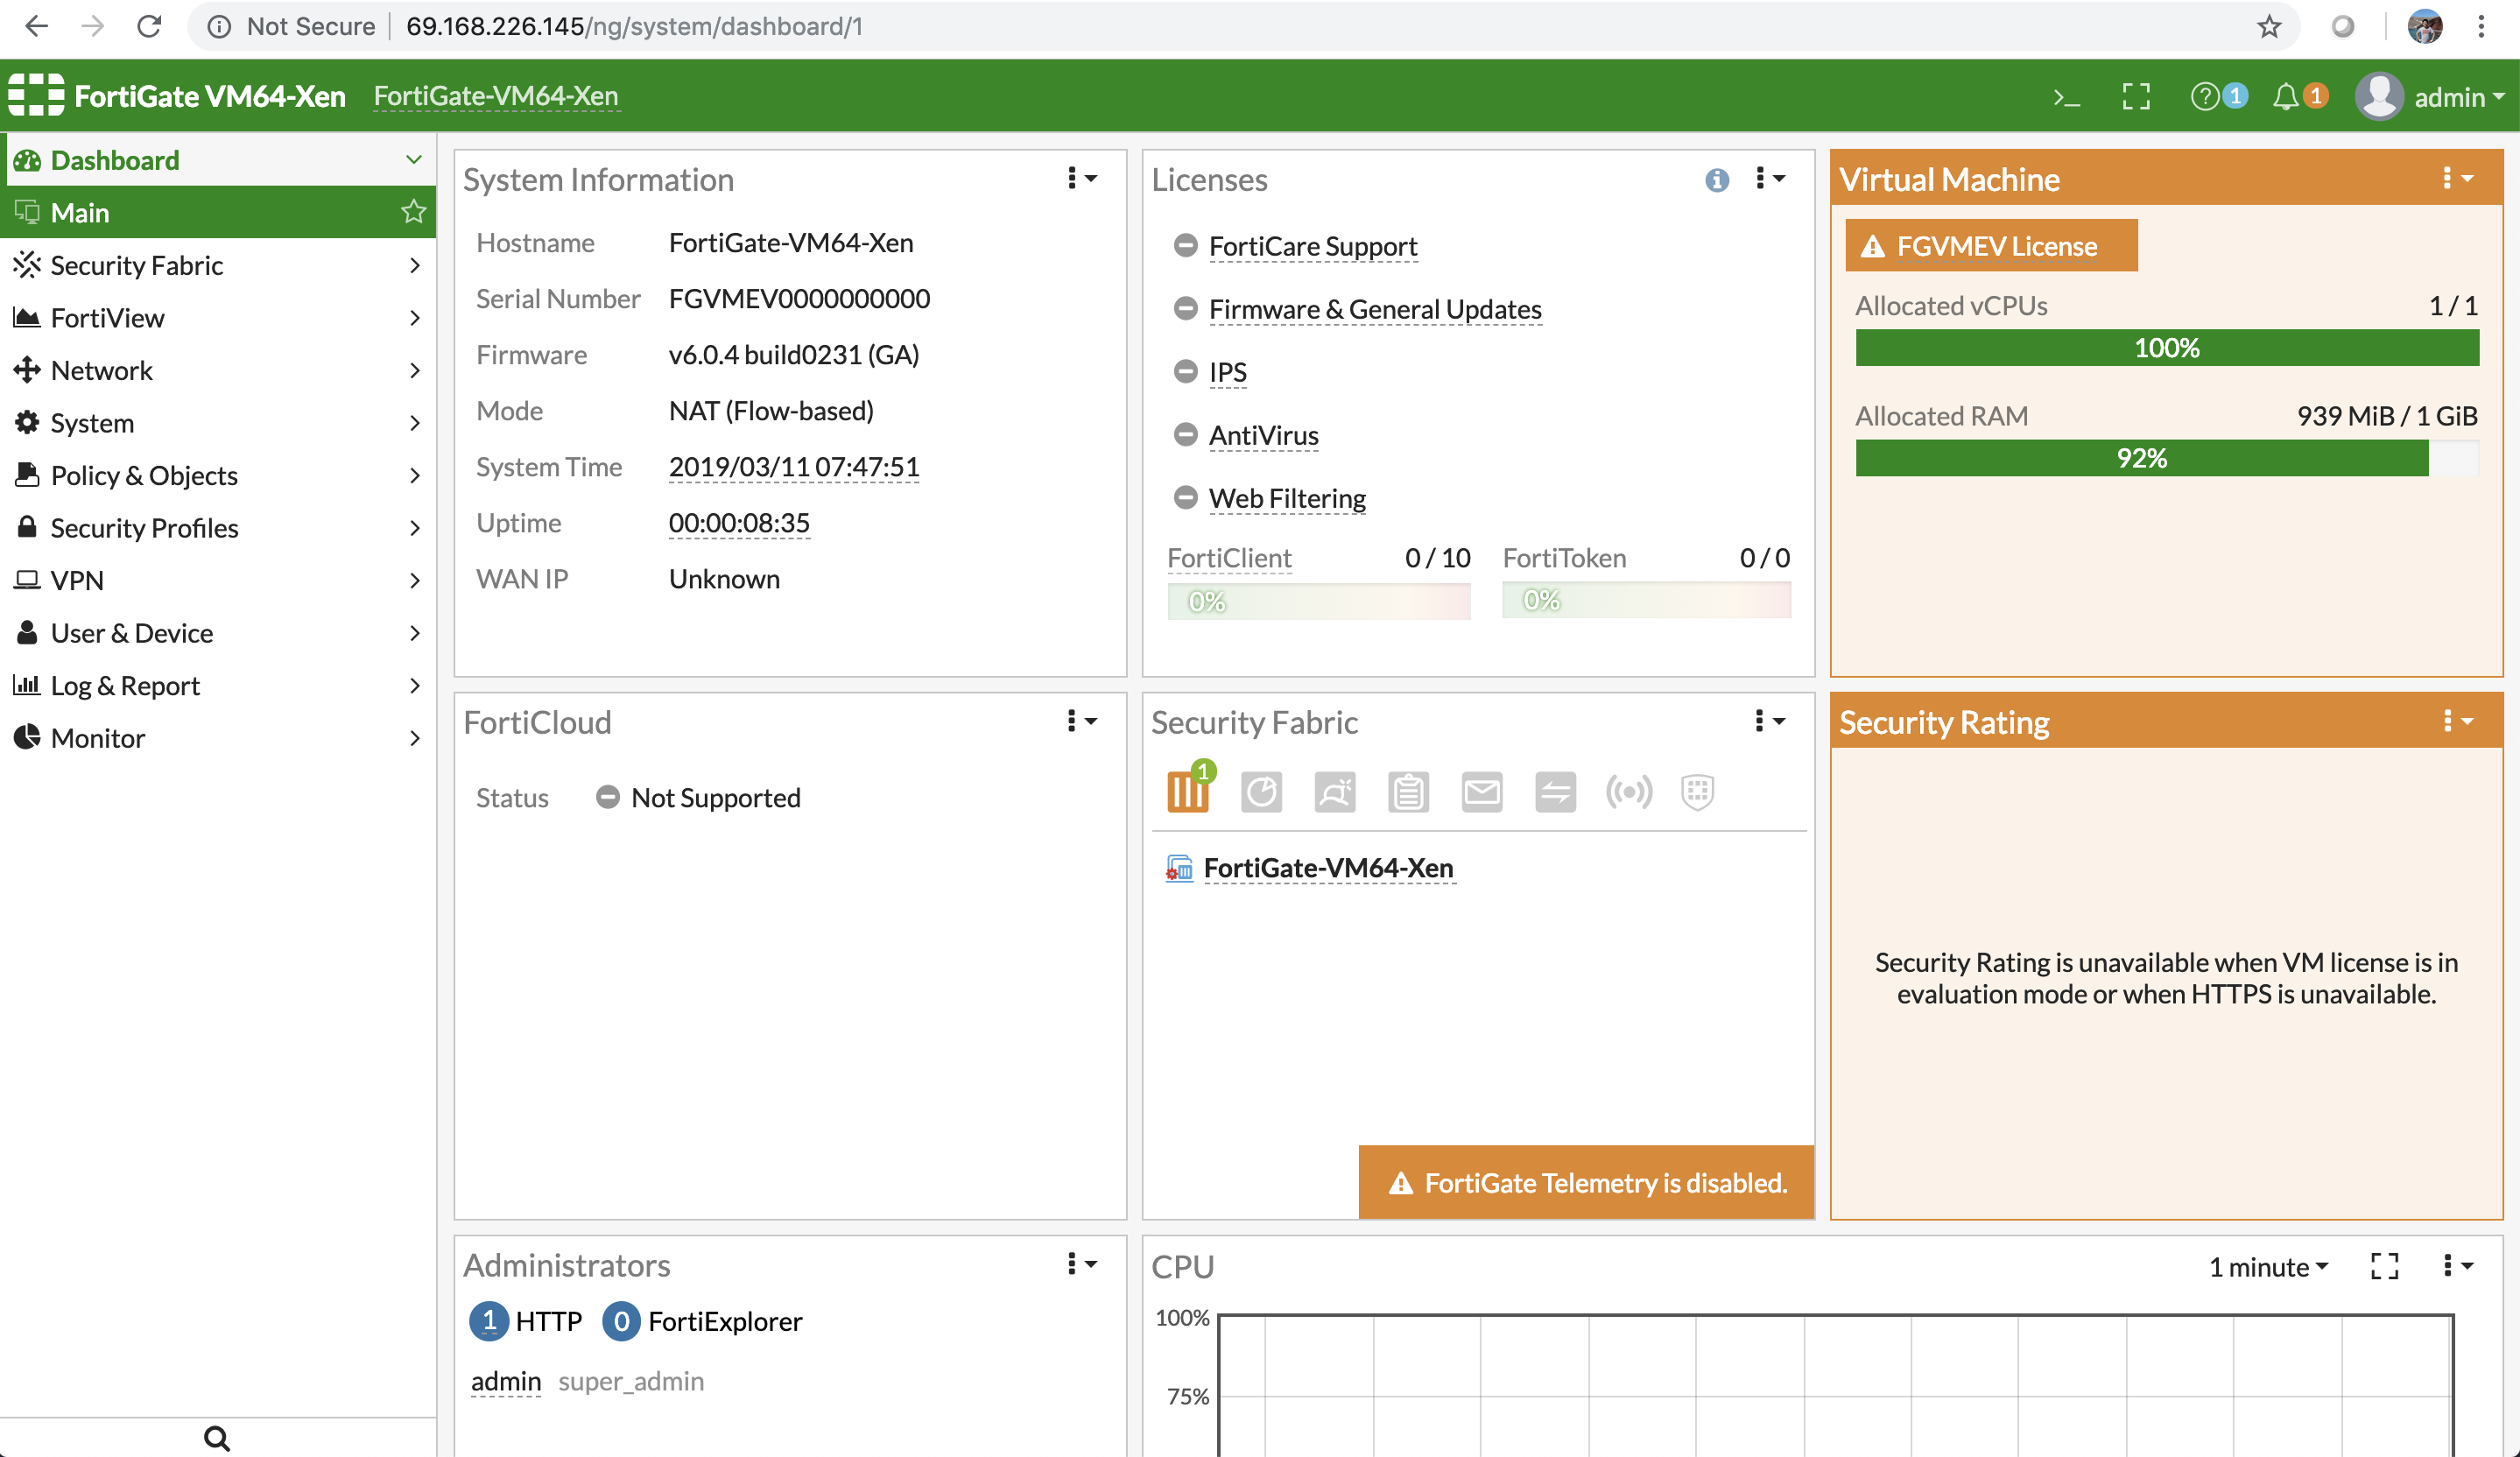
The FortiGate web-based manager is now available, following the successfully login process.
-
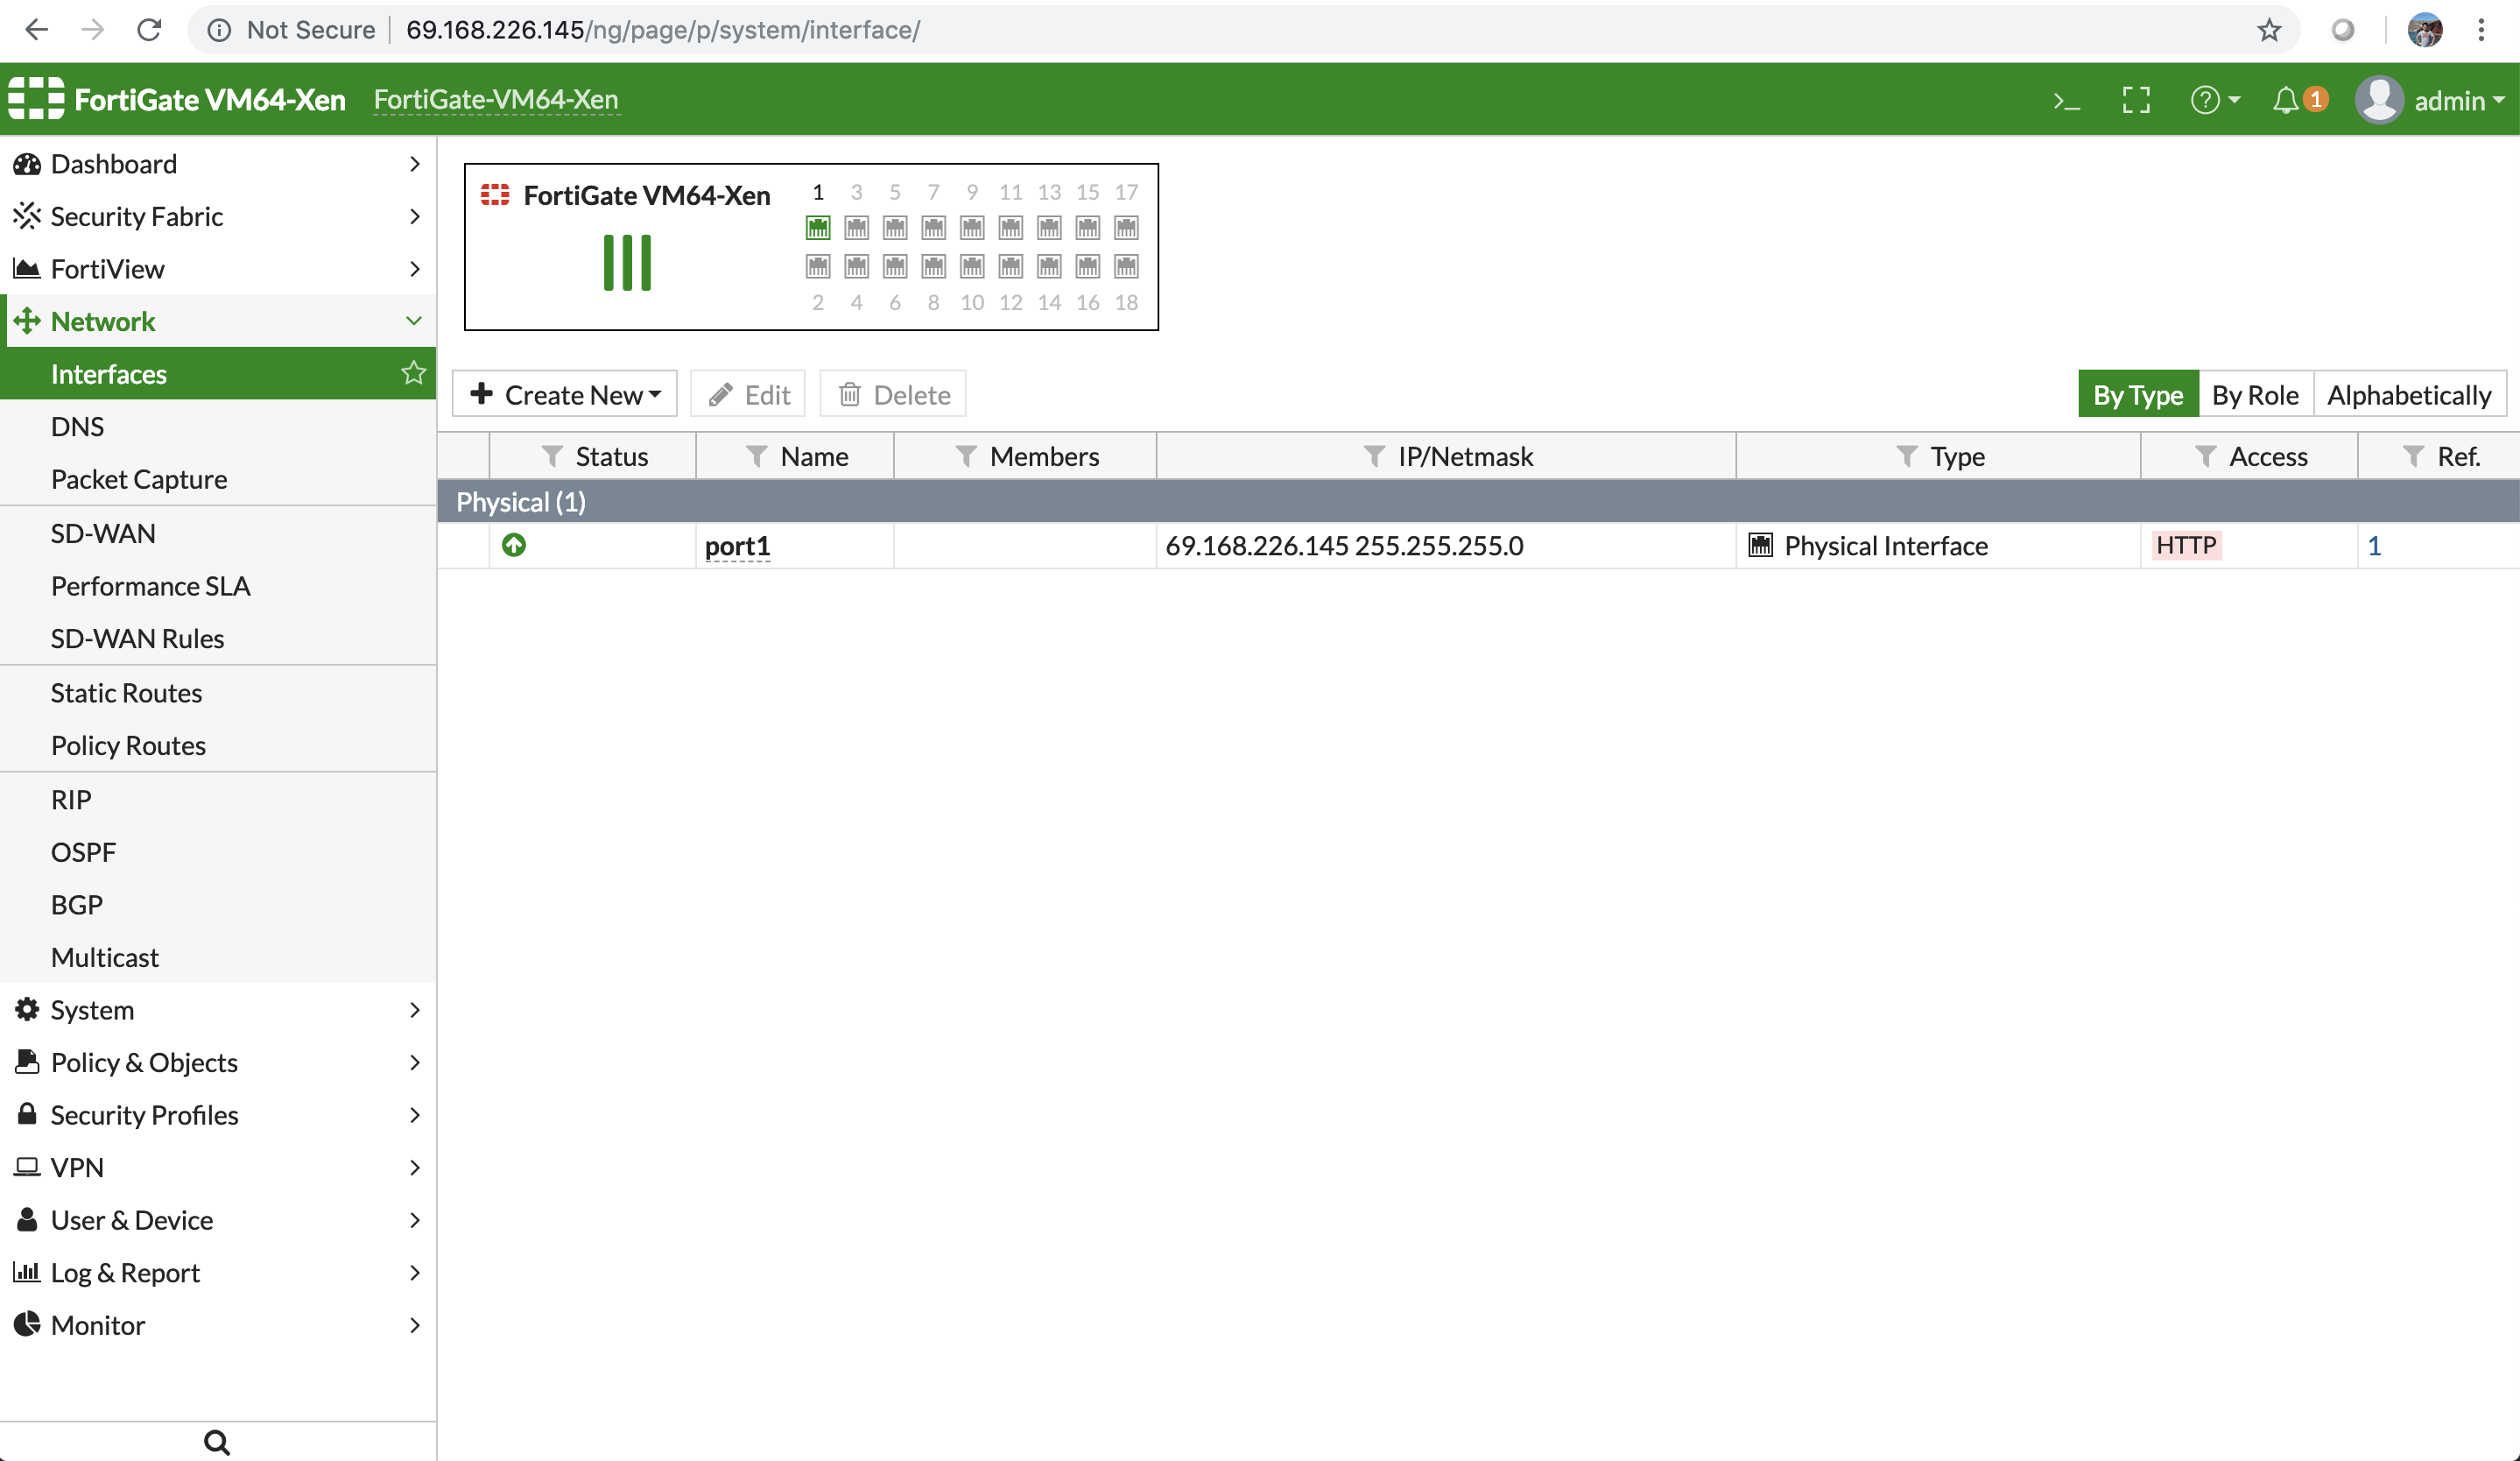
The network interfaces of the FortiGate VM are available for review.
Add more network interfaces to FortiGate VM
The maximum number of network interfaces that can be accommodated by a FortiGate instance is 18, starting with the FortiGate versions 5.6.6 and 6.0.3.
-
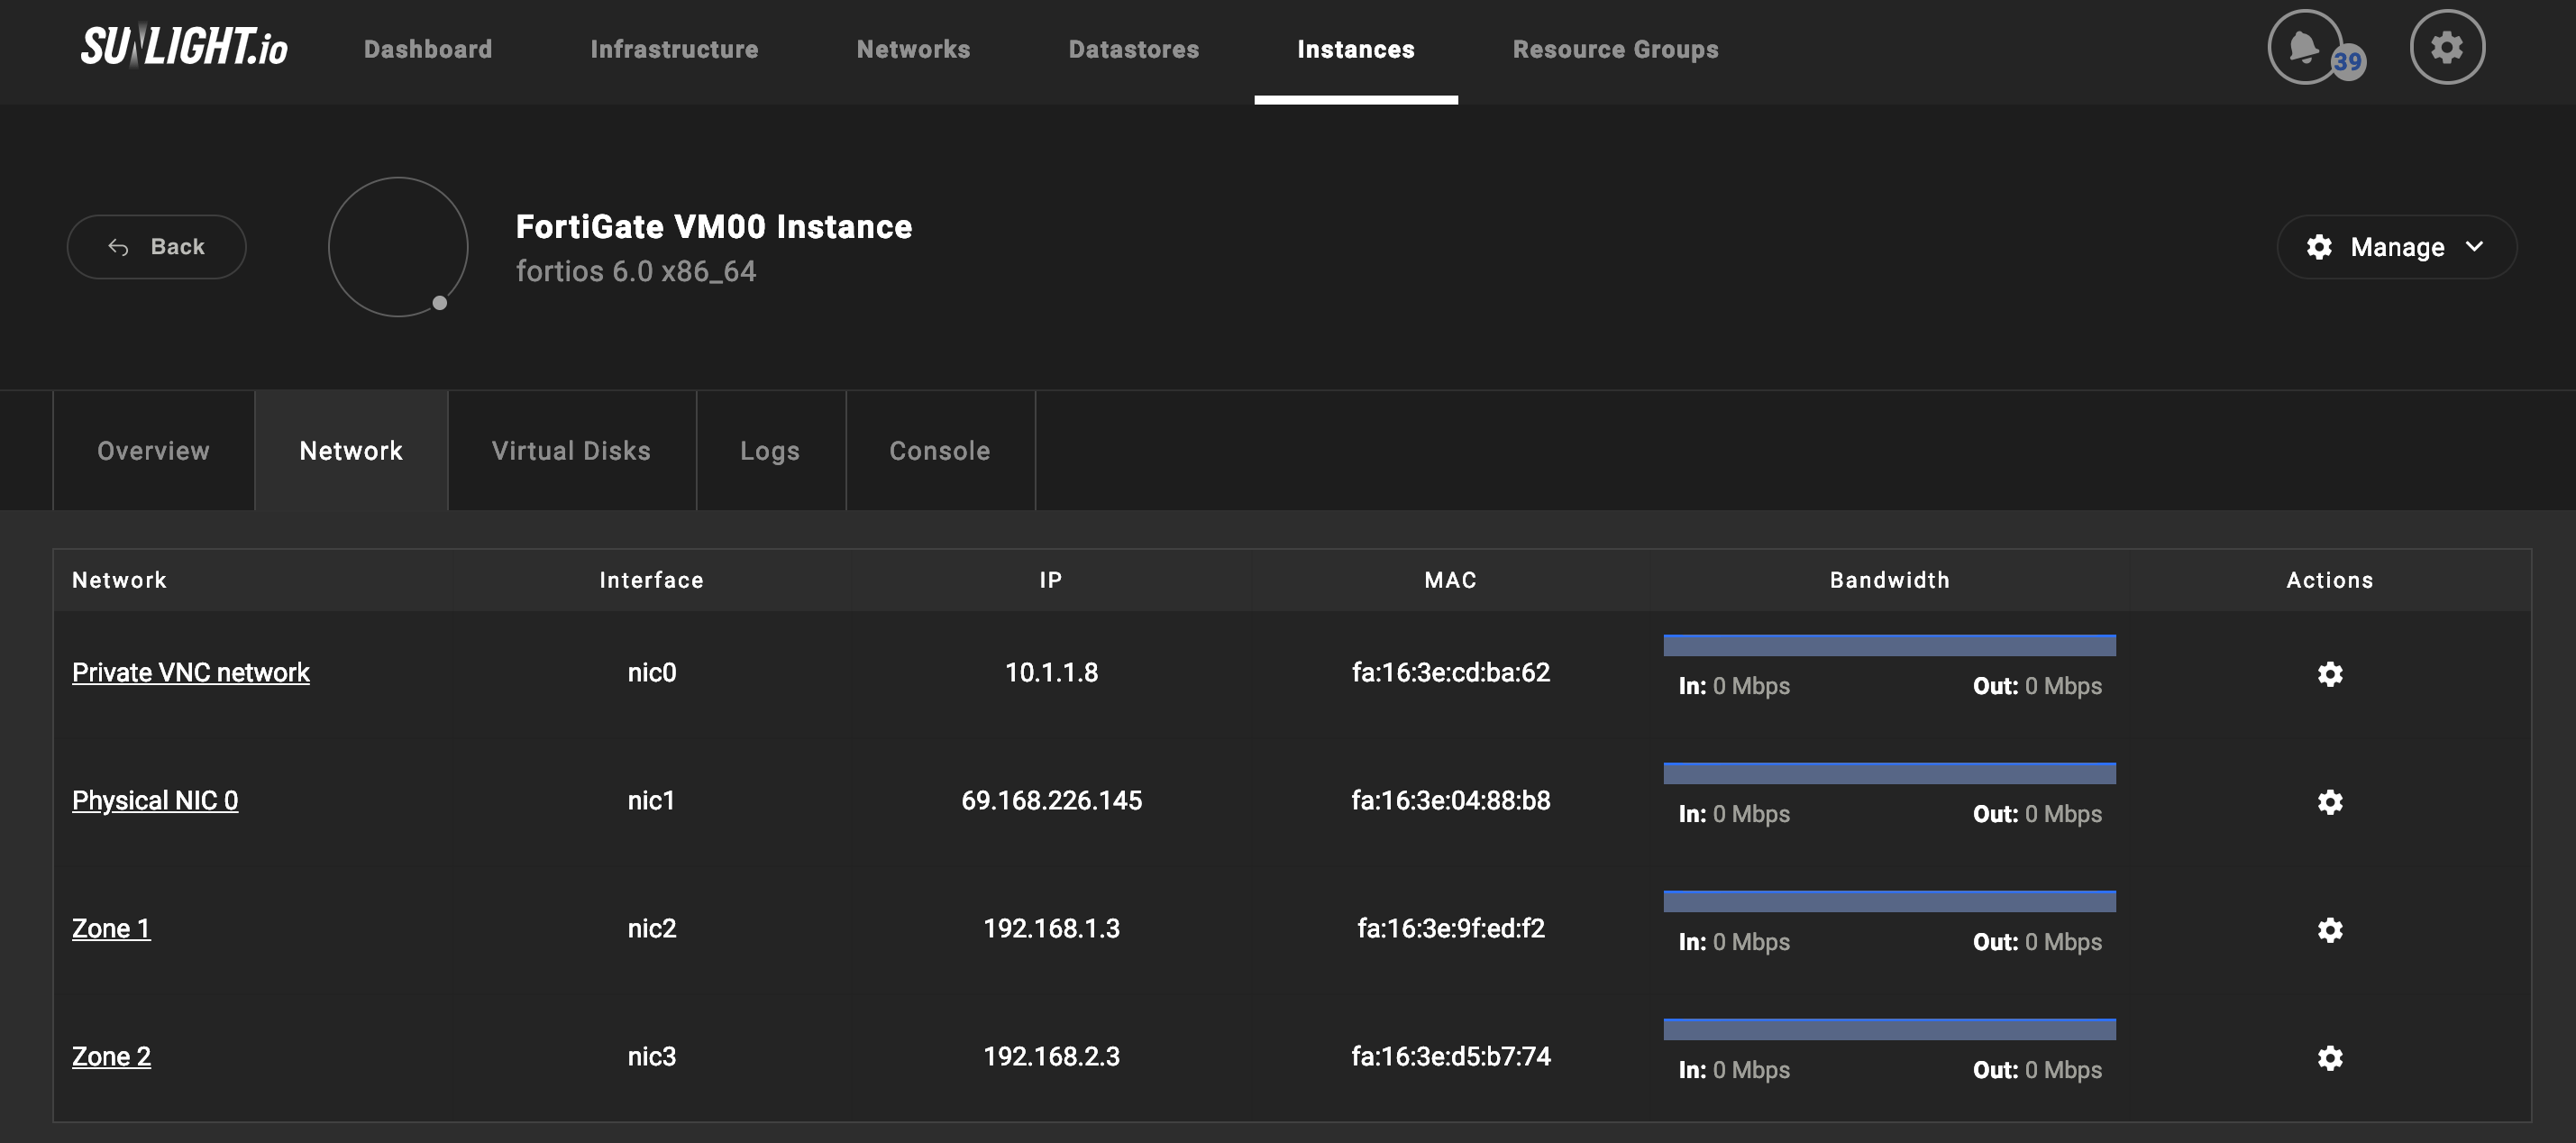
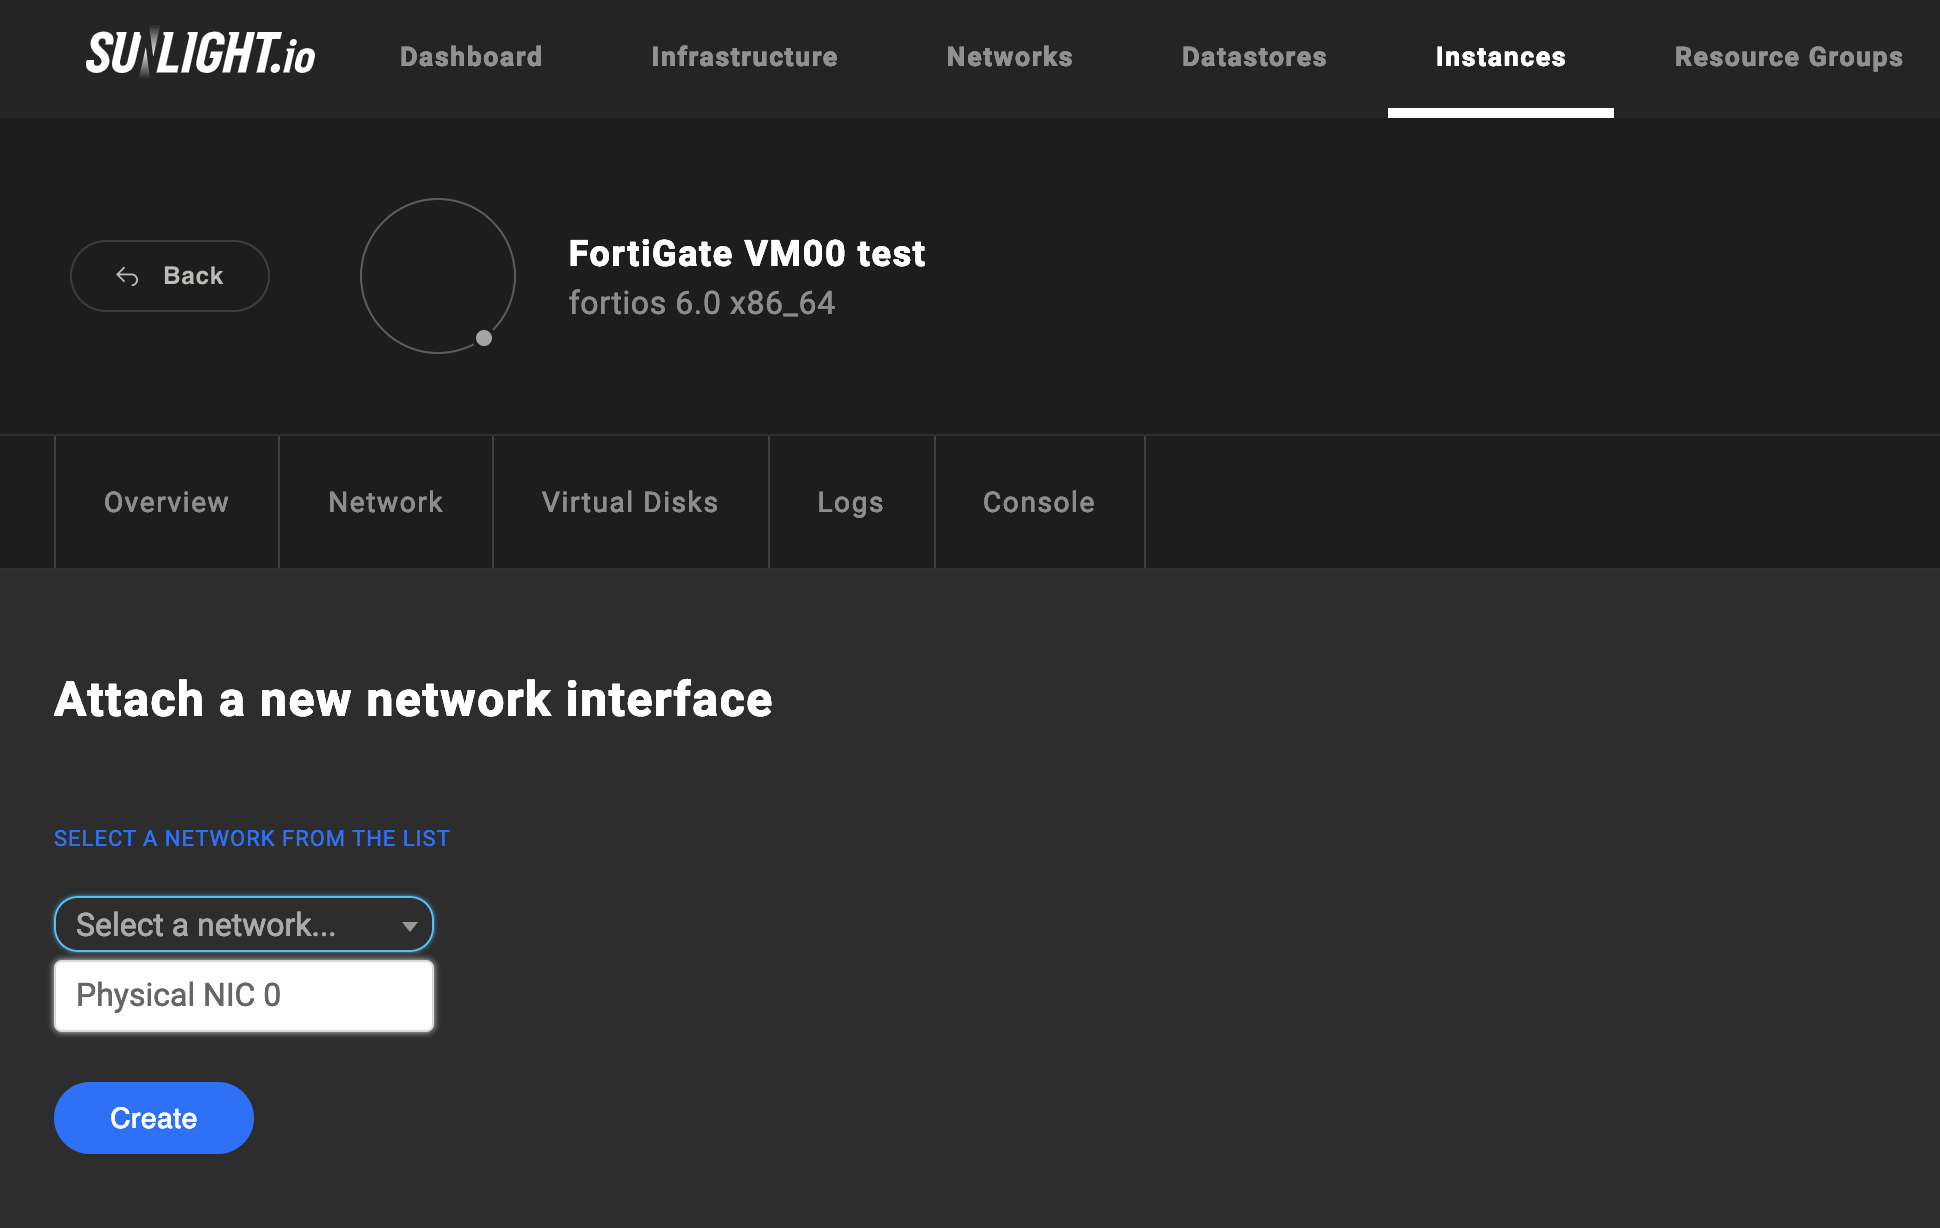
Attach a new network interface to the FortiGate VM on Sunlight UI.
-
Select the network which the new interface is connected to.
-
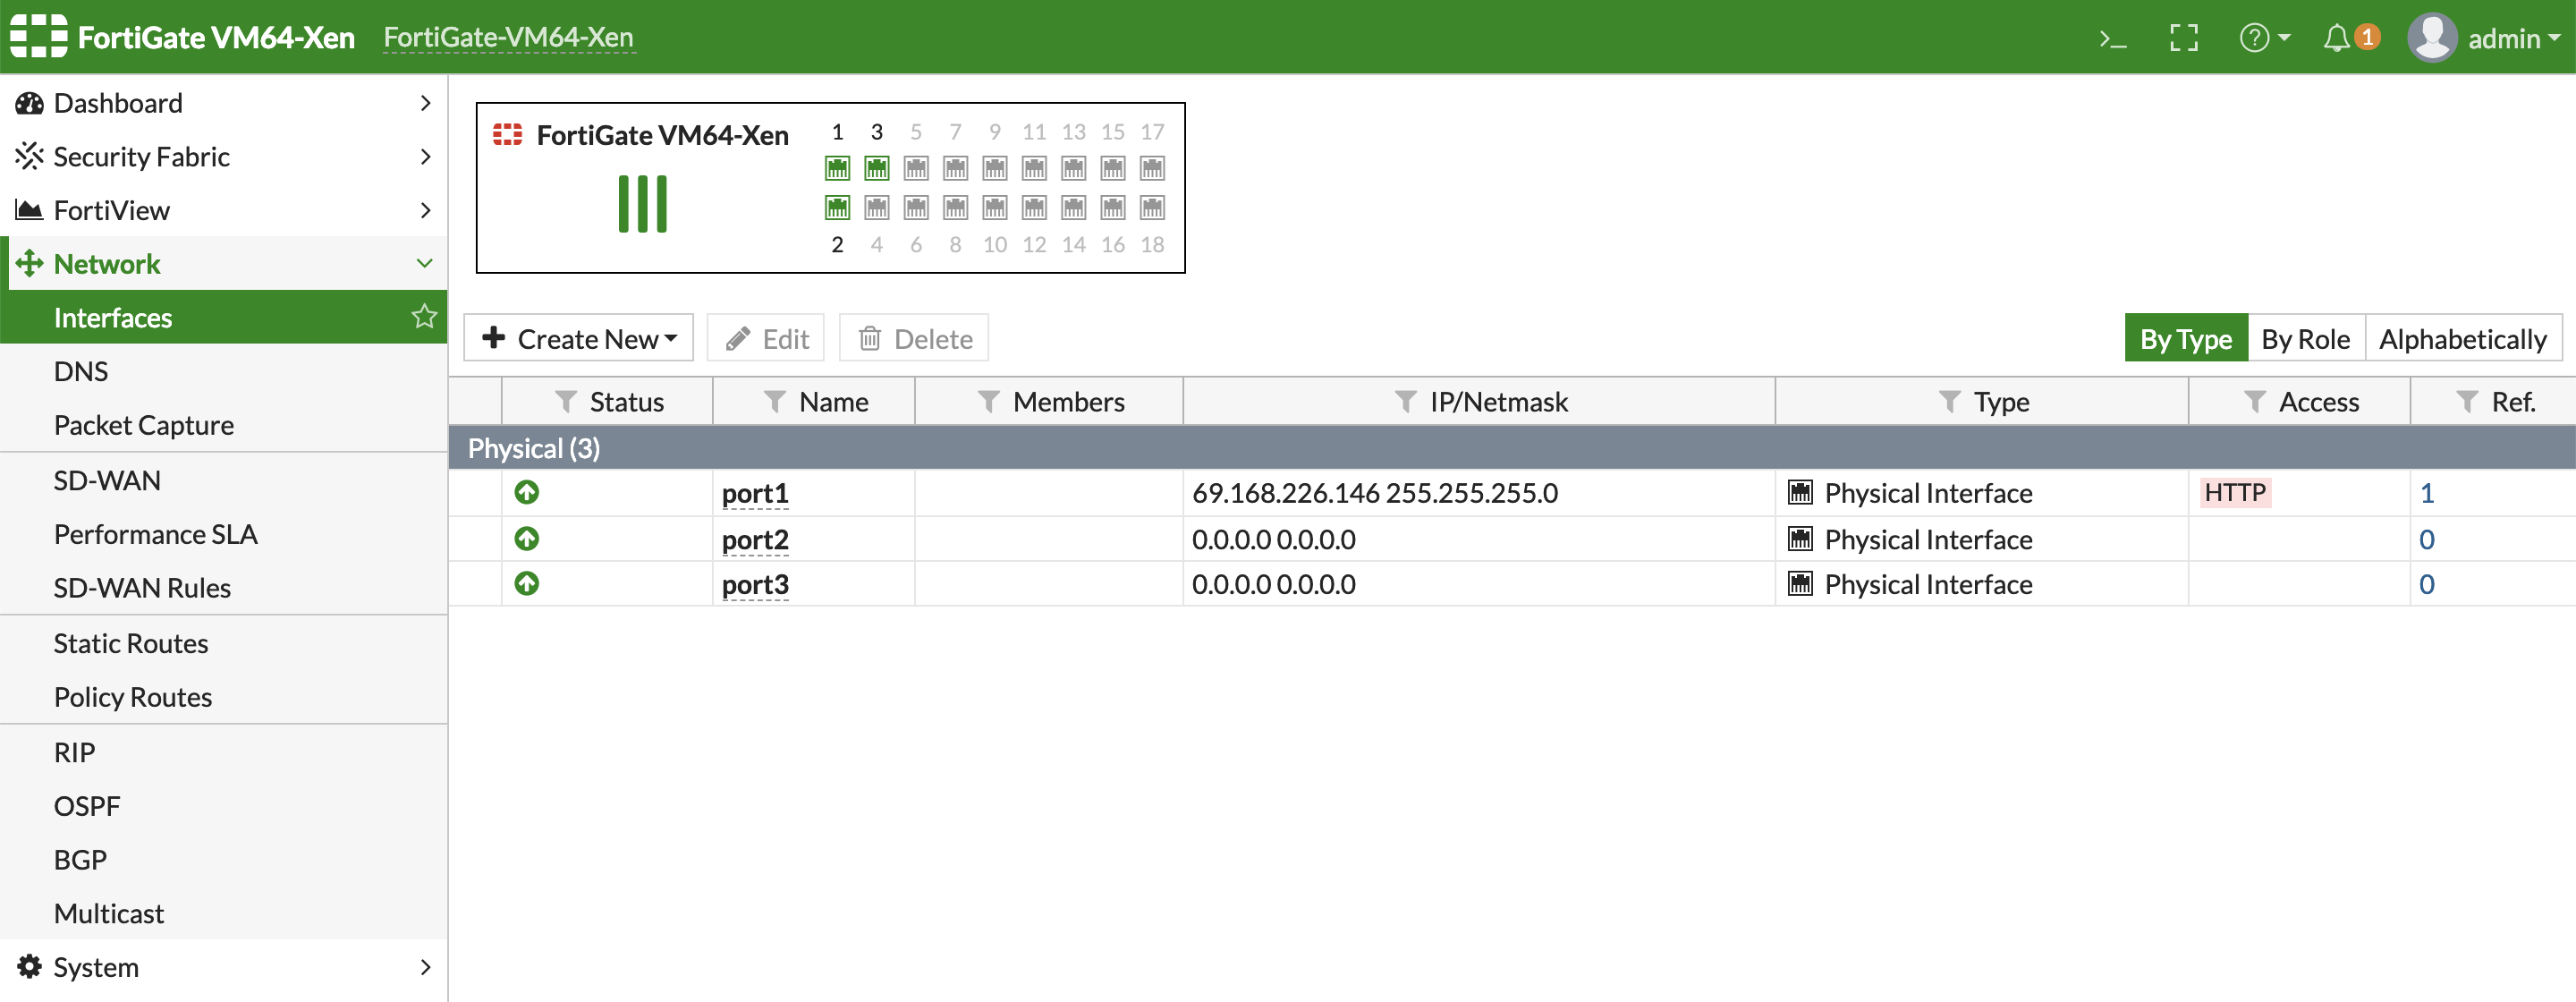
Configure the network interfaces on FortiGate web-based manager. All the interfaces attached to the FortiGate VM should be available and are presented as physical interface connected to the ports of FortiGate.
 The interface can be configured according to user needs, including Virtual Wire Pair and VLAN tagged interface.
